


TL;DR:
- An international traveler eSIM workflow simplifies activating and managing digital SIM profiles before and during trips. It involves device compatibility checks, pre-installation at home, and enabling data roaming on the travel eSIM for seamless connectivity. This process prevents roaming surprises and minimizes airport activation delays, especially for long or multi-border journeys.
An international traveler eSIM workflow is the process of digitally activating and managing an embedded SIM (eSIM) profile to maintain mobile data access abroad without swapping physical SIM cards. Unlike traditional SIM logistics, this workflow runs entirely through your device settings and a QR code or app, and activation completes in 30 seconds to 2 minutes once you land. Platforms like Esimglobe deliver eSIM profiles instantly as digital codes, so you can purchase a plan before your flight and install it on Wi-Fi at home. The result is a faster, cheaper alternative to airport SIM kiosks and surprise roaming bills.
What does an international traveler eSIM workflow require?
Every successful eSIM setup starts with two non-negotiable checks: device compatibility and carrier unlock status. Your phone must support eSIM technology. Most flagship devices released after 2018, including the Apple iPhone XS and later, Samsung Galaxy S20 and later, and Google Pixel 3 and later, include eSIM hardware. Your device also needs to be carrier unlocked. A locked phone will reject foreign eSIM profiles regardless of the plan you purchase.
Device and plan requirements at a glance
| Requirement | What to check |
|---|---|
| eSIM hardware | Settings > General > About > look for “eSIM” or “Digital SIM” |
| Carrier unlock status | Contact your home carrier or check Settings > Cellular |
| Operating system | iOS 12.1 or later; Android 9 or later for most devices |
| Wi-Fi access | Required during profile installation |
| Data roaming toggle | Must be enabled on the travel eSIM line after installation |
Once you confirm compatibility, choose your plan type. Single-country plans work best when you stay in one destination and want local network prioritization. Multi-country or regional plans suit travelers crossing multiple borders. Coverage maps and plan types directly affect connectivity quality and cost, so review them before buying.
For trips under two weeks with roaming already included in your home plan, a dedicated travel eSIM may not be necessary. Trips exceeding 60–90 days or travel to countries with limited roaming agreements are where eSIM value becomes clear. That threshold helps you decide whether the extra setup step is worth it.
Key requirements before you start:
- Unlocked, eSIM-compatible device
- Stable Wi-Fi connection for profile download
- A purchased eSIM plan with a QR code or app-based installation link
- Data roaming enabled on the travel eSIM line (not the home SIM line)
- Home SIM data roaming turned off to prevent accidental charges
Pro Tip: Before traveling, go to Settings > Cellular and rename your lines. Label one “Home” and the other with the destination country. This prevents confusion when switching data lines at the airport.
How do you activate your eSIM step by step?
Pre-travel installation on Wi-Fi is the single most effective way to avoid activation delays at the airport. Install the eSIM profile at home, and the plan activates automatically when your device detects local networks after landing. You skip the scramble for airport Wi-Fi and start with data the moment you clear customs.
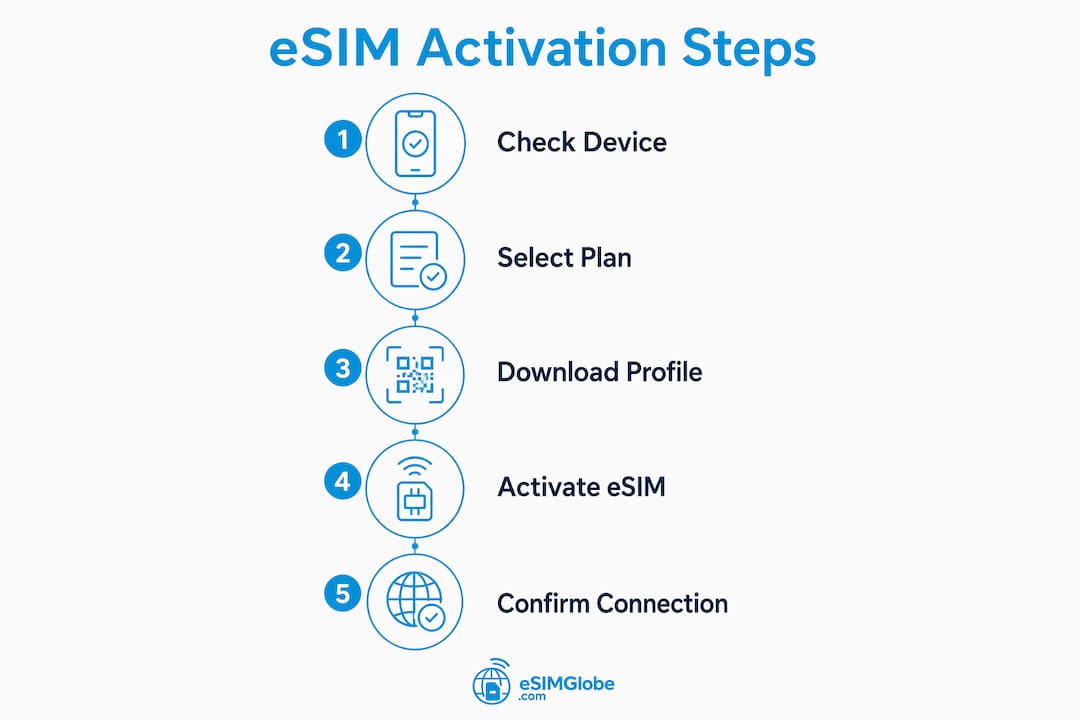
Follow these steps for a clean activation:
- Purchase your eSIM plan from a provider like Esimglobe and receive your QR code or app link by email.
- Connect to Wi-Fi at home or in a hotel before departure.
- Install the eSIM profile. On iPhone: Settings > Cellular > Add eSIM > Use QR Code. On Android: Settings > Connections > SIM Manager > Add eSIM.
- Label your lines. Rename the new profile to your destination country so you can identify it instantly.
- Set the travel eSIM as your preferred data line before boarding. On iPhone: Settings > Cellular > Cellular Data > select travel eSIM. On Android: Settings > Connections > SIM Manager > select travel eSIM for mobile data.
- Turn off data roaming on your home SIM line. This prevents your home carrier from charging international roaming rates.
- Enable data roaming on the travel eSIM line. This step is mandatory. Enabling roaming on the travel eSIM line is required even on flat-rate plans. Skipping it causes a “no service” error.
- Board your flight. Enable Airplane Mode for the flight as normal.
- On arrival, turn off Airplane Mode. Your device scans for local networks. Connection establishes within 30 seconds to 2 minutes if settings are correct.
- Confirm connectivity. Open a browser or check signal bars. If data works, you are set.
Pro Tip: Most devices default back to the home SIM for data on arrival. Always double-check Settings > Cellular > Cellular Data after landing to confirm the travel eSIM is still selected as the active data line.
Checking your activation steps against a provider-specific guide is worth doing before your first trip, since menu paths vary slightly between iOS and Android versions.
What should you do when your eSIM shows no service?
The most common cause of “no service” after landing is a misconfigured data roaming setting. The default mobile data setting often reverts to the home SIM on arrival, and travelers do not notice until they try to load a map. Two minutes of settings checks fix the majority of connectivity failures.
Critical: Data roaming must be enabled on the travel eSIM line even if your plan charges a flat rate. Leaving data roaming off on the travel eSIM causes a complete loss of network access regardless of plan status.
Quick troubleshooting checklist:
- Check the active data line. Settings > Cellular > Cellular Data. Confirm the travel eSIM is selected, not the home SIM.
- Verify data roaming is on for the travel eSIM. Settings > Cellular > travel eSIM line > Data Roaming: ON.
- Verify data roaming is off for the home SIM. This prevents double roaming charges.
- Toggle Airplane Mode. Turn it on, wait 10 seconds, then turn it off. This network refresh forces the device to scan and register on the local network.
- Restart the device. A full reboot clears registration errors that a simple Airplane Mode toggle does not resolve.
- Check plan validity. Log into your provider account or app to confirm the plan is active and has remaining data.
Pro Tip: If you cross a border mid-trip and lose signal, the Airplane Mode toggle is your first move. It takes 10 seconds and resolves most cross-border registration issues without any settings changes.
Most connectivity failures trace back to one of three causes: the wrong data line is selected, data roaming is off on the travel eSIM, or the plan has expired. Fixing any one of these three issues restores service in under two minutes.
Single-country vs. multi-country eSIM plans: which fits your trip?
Single-country plans prioritize local network access, while multi-country plans trade some network depth for geographic flexibility. The right choice depends on your itinerary, not just price. A traveler spending three weeks in Japan benefits more from a Japan-specific plan with full local network access than from a regional Asia plan that may deprioritize data speeds in rural areas.
| Feature | Single-country plan | Multi-country plan |
|---|---|---|
| Network prioritization | High. Uses primary local carriers | Moderate. May use secondary carriers |
| Coverage in rural areas | Strong within that country | Variable across borders |
| Best for | Stays of 5+ days in one country | Trips covering 3+ countries |
| Cost per GB | Lower for single destination | Higher but consolidated billing |
| Setup complexity | Simple. One plan, one country | Simple. One plan, multiple countries |
| Flexibility | Low. Must buy new plan per country | High. One plan covers the region |
Multi-country plans from providers like Esimglobe cover entire regions such as Europe, Southeast Asia, or the Americas under a single purchase. This removes the need to buy and install a new eSIM profile at each border. For digital nomads moving between countries every few weeks, that convenience outweighs the modest cost premium.
Single-country plans make sense when local network quality matters. A freelancer working remotely in South Korea for a month needs reliable, fast data. A regional Asia plan may route traffic through a partner network and deliver slower speeds than a Korea-specific plan on a tier-one local carrier.
Most eSIM-compatible devices store multiple eSIM profiles, so you can install both a regional plan and a country-specific plan and switch between them as needed. That flexibility is one of the clearest advantages of eSIM over physical SIM cards. You can find detailed advice on selecting the right package in Esimglobe’s eSIM purchasing tips guide.
For rural destinations or countries with limited carrier agreements, always check the coverage map before purchasing. A plan that works perfectly in Tokyo or Paris may deliver weak signal in mountainous regions of Georgia or rural Peru.
Key Takeaways
A correctly configured eSIM workflow eliminates roaming surprises, airport SIM queues, and connectivity gaps by installing the profile before travel and setting data roaming on the right line.
| Point | Details |
|---|---|
| Install before departure | Download the eSIM profile on Wi-Fi at home to avoid airport activation delays. |
| Enable roaming on travel eSIM | Data roaming must be on for the travel eSIM line even on flat-rate plans. |
| Disable roaming on home SIM | Turning off home SIM roaming prevents unexpected charges from your home carrier. |
| Use Airplane Mode to troubleshoot | A 10-second Airplane Mode toggle resolves most post-landing connectivity failures. |
| Match plan type to itinerary | Single-country plans suit long stays; multi-country plans suit multi-destination trips. |
What I have learned from managing eSIMs across dozens of trips
The advice that saves the most frustration is the one travelers skip most often: install the eSIM before you leave home. Airports are the worst place to troubleshoot a QR code that will not scan or a profile that will not download. I have watched travelers spend 40 minutes at an airport gate trying to get a plan working because they assumed they could handle it on arrival. Pre-installation on your home Wi-Fi takes five minutes and removes that entire category of stress.
The roaming toggle is the second thing most travelers get wrong. The logic feels counterintuitive. You are paying for a local data plan, so why does “roaming” need to be on? The answer is that your device treats any network outside your home carrier as a roaming network, regardless of what you paid for. Skipping that toggle is the single most common cause of the “no service” screen after landing.
Managing multiple eSIM profiles is easier than it sounds once you label your lines clearly. I keep a home line, a regional plan for Europe, and a country-specific plan for wherever I am based that month. Switching between them takes three taps. The ability to store multiple profiles without carrying extra SIM cards is the part of this technology that physical SIM users genuinely do not appreciate until they try it.
One honest caveat: if your home carrier includes solid international roaming in your existing plan and you travel for less than two weeks, the eSIM workflow may not save you money or time. The T-Mobile Magenta Max plan, for example, includes data in over 215 countries. For short trips on plans like that, the extra setup step adds complexity without clear benefit. Know your existing plan before you buy a travel eSIM.
The travelers who get the most value from this workflow are digital nomads and frequent international travelers who cross multiple borders per month. For that group, a well-managed eSIM setup is the difference between paying $0.10 per MB in roaming fees and paying a flat $15 for a week of regional data. The math is not close.
— daniele
Esimglobe makes global eSIM access straightforward
Esimglobe offers eSIM profiles for countries and regions worldwide, delivered instantly as digital codes after purchase. No physical SIM card, no waiting at a carrier store, and no roaming surprises from your home carrier.

Travelers can browse global eSIM packages by country or region, select a data plan that fits their trip length, and receive the QR code by email within minutes. The platform supports USD, EUR, and GBP, and the interface is available in multiple languages. For travelers who want a full walkthrough before purchasing, Esimglobe’s international travel eSIM guide covers plan selection, device compatibility, and activation in one place.
FAQ
What is an eSIM workflow for international travel?
An eSIM workflow is the process of purchasing, installing, and activating a digital SIM profile on your device before or upon arrival abroad. It replaces physical SIM swaps with a settings-based process that takes under five minutes.
How long does eSIM activation take after landing?
Connection typically establishes within 30 seconds to 2 minutes after turning off Airplane Mode, provided data roaming is enabled on the travel eSIM line and the correct data line is selected.
Why does my eSIM show no service after landing?
The most common cause is data roaming being turned off on the travel eSIM line. Enable data roaming for the travel eSIM in Settings > Cellular, then toggle Airplane Mode for 10 seconds to refresh the network connection.
Should I use a single-country or multi-country eSIM plan?
Single-country plans deliver stronger local network access for stays in one destination. Multi-country plans are more practical for trips covering three or more countries, since one plan covers the entire region without additional purchases.
Do I need an eSIM for every international trip?
Not necessarily. Short-term travelers with international roaming included in their home plan may not need a separate eSIM. Travelers on trips longer than 60–90 days or visiting countries with limited roaming agreements benefit most from a dedicated travel eSIM.