


TL;DR:
- Replacing a travel SIM involves either requesting a physical card or re-provisioning an eSIM to restore connectivity abroad. Preparation, such as unlocking your device and saving QR codes, significantly speeds up the process and prevents delays. Using an eSIM paired with a physical backup ensures faster activation and reliable service during international trips.
The travel SIM card replacement process is defined as the procedure travelers use to request, receive, and activate a new physical SIM card or re-provision an eSIM profile to restore mobile connectivity while abroad. Whether you lost your SIM in a Tokyo taxi or your eSIM profile vanished after a factory reset, the steps you take in the next hour determine whether you stay connected or go dark. This guide covers both physical SIM replacement and eSIM re-provisioning, including the prerequisites, activation steps, and troubleshooting fixes that matter most in 2026. Esimglobe, Apple, and major carriers each handle these procedures differently, and knowing those differences saves you time and money.
What is the difference between physical SIM and eSIM replacement?
Physical SIM replacement and eSIM re-provisioning are fundamentally different procedures. Understanding that difference before you travel is the single most useful thing you can do.
A physical SIM card is a removable chip. When it is lost or damaged, you contact your carrier, order a replacement card, and wait for it to arrive by post or pick it up at a local store. Replacement SIMs take time to arrive, and activation happens afterward through the carrier’s app or website using two-factor authentication. In countries where your carrier has no retail presence, postal delivery can take several days. That is a real problem when you need data now.
An eSIM is an embedded chip soldered directly into your phone. You cannot remove it or swap it between devices. Replacing an eSIM means re-provisioning: your carrier issues a new QR code or sends a new profile via their app, and you scan or download it to restore service. eSIM provisioning is near-instantaneous, but QR codes are single-use. Delete the profile without saving the code, and you must request a new one from the carrier.
| Feature | Physical SIM | eSIM |
|---|---|---|
| Replacement method | New card by mail or store pickup | New QR code or app-based profile |
| Activation speed | Hours to days | Minutes |
| Portability between devices | Yes, swap freely | No, requires carrier re-issuance |
| Risk if device breaks | SIM is recoverable | Profile is inaccessible |
| Dual-SIM capability | Yes, with eSIM slot | Yes, alongside physical SIM |
Some modern providers now use a no-expiry profile model where the eSIM stays installed indefinitely. Data packages still expire, but the profile itself does not need re-provisioning after each trip. That model is becoming the standard for frequent travelers.
Pro Tip: Save your eSIM QR code as a screenshot in a cloud folder like Google Photos or iCloud before you travel. If you ever need to re-provision, you will have the code accessible from any device.
Travel eSIMs do not replace your home SIM. They operate alongside it in a dual-SIM configuration, with your home SIM handling calls and SMS and the travel eSIM handling data. That setup keeps your home number active while avoiding roaming charges abroad.
What do you need before starting a SIM replacement?
Preparation before you initiate any replacement request cuts the process from hours to minutes. Most replacement failures trace back to missing one item on this list.

Device carrier unlock status
Your phone must be carrier-unlocked before you can install a new SIM or eSIM from a different provider. Carrier unlocking is a prerequisite for any SIM replacement or eSIM installation. Locked phones reject foreign network profiles entirely. Check your unlock status in your phone’s settings under “Carrier” or contact your home carrier before departure.
Account credentials and secondary contact
Your carrier will verify your identity before issuing any replacement. Have your account username, password, and the phone number or email address linked to your account ready. Two-factor authentication codes go to your registered contact. If that contact is the SIM you just lost, you need a backup method set up in advance.
Identification documents
In-store replacements in most countries require a government-issued photo ID. Remote verification for eSIM re-provisioning often requires the same. Carry a digital copy of your passport in your email or a cloud storage app.
Stable Wi-Fi connection
eSIM installation requires an internet connection. Airport Wi-Fi is often unreliable and may require local SMS authentication to access, which creates a circular problem if your SIM is already inactive. Use hotel Wi-Fi or a café connection instead.
SIM card size and phone model
Physical SIM replacements require the correct card format: nano-SIM, micro-SIM, or standard SIM. Know your phone model before you call the carrier. Most phones since 2018 use nano-SIM, but confirming takes 30 seconds and prevents a wasted trip to a store.
Here is a quick checklist before you initiate any replacement:
- Confirm your device is carrier-unlocked
- Locate your carrier account login and backup authentication method
- Have a government-issued photo ID accessible (digital copy is fine)
- Connect to a stable Wi-Fi network
- Know your phone model and SIM card size
- Save your eSIM QR code to cloud storage before travel
Pro Tip: Install and activate your travel eSIM at home before departure. This avoids the airport Wi-Fi problem entirely and gives you time to troubleshoot any activation errors while you still have reliable connectivity.
For a broader look at preparation, the global travel checklist from SwappaHome covers SIM management alongside other travel essentials worth reviewing before any international trip.
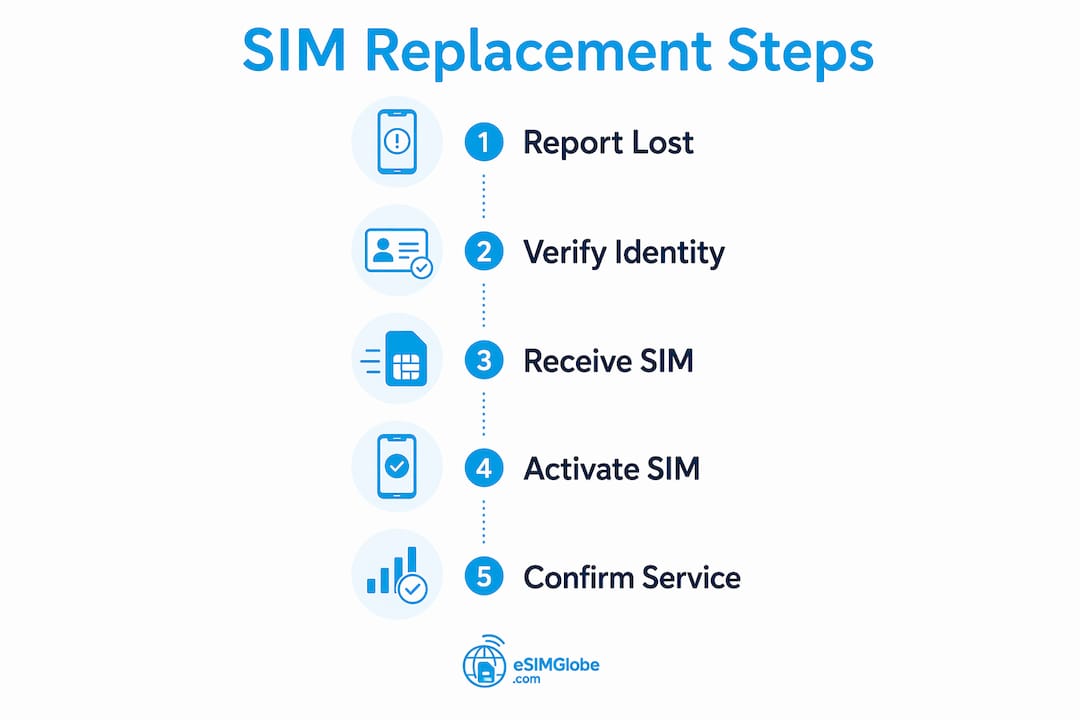
How to replace a lost or damaged travel SIM card step by step
The lost travel sim card procedure follows a clear sequence for both physical SIM and eSIM. Follow these steps in order to restore connectivity as fast as possible.
Steps for physical SIM replacement
- Contact your carrier immediately. Call the provider’s automated support line to report the lost or damaged SIM and request a replacement. Automated support lines let you order a replacement without waiting for a live agent, which speeds up the process significantly.
- Verify your identity. Provide your account number, PIN, or the last four digits of your ID as requested. Complete any two-factor authentication sent to your backup contact.
- Choose delivery or pickup. Select mail delivery to your hotel or accommodation, or ask the carrier if a local partner store can issue a replacement SIM on the spot. In major cities, same-day pickup is often available through carrier retail partners.
- Insert the new SIM. Once you receive the card, power off your phone, insert the SIM, and power back on.
- Activate via carrier app or website. Log into your carrier account and follow the activation prompts. Activation typically completes within a few minutes after the carrier registers the new card on their network.
- Confirm service. Make a test call and load a webpage to confirm both voice and data are active.
Steps for eSIM re-provisioning
- Contact your eSIM provider. Use their website chat, email, or app to report the issue and request a new QR code or profile link. Have your order number and account email ready.
- Verify your identity. Providers typically ask for your order confirmation or registered email. Some require a photo ID for security.
- Receive the new QR code. The provider sends a new QR code by email or displays it in their app. Remember: QR codes are single-use, so do not scan it until you are ready to complete the installation.
- Scan or download the profile. Go to your phone’s Settings, select “Mobile Data” or “Cellular,” choose “Add eSIM,” and scan the QR code. On supported devices, you can also tap a link sent by the provider.
- Label and prioritize the eSIM. Name the new eSIM profile (for example, “Europe Data”) and set it as the default for cellular data in your dual-SIM settings.
- Test connectivity. Open a browser and confirm data is working. If the profile installs but shows no signal, toggle airplane mode off and on to force network registration.
| Step | Physical SIM | eSIM |
|---|---|---|
| Report and request | Automated phone line or online portal | Provider chat, email, or app |
| Identity verification | Account PIN or ID | Order number or registered email |
| Receive replacement | Mail or store pickup | New QR code by email or app |
| Activation method | Carrier app or website | Scan QR code or tap profile link |
| Confirmation | Test call and data | Browser test and signal check |
Pro Tip: When you set up dual SIM after replacement, go to Settings and manually assign the travel eSIM as the default for cellular data. Many phones default to the physical SIM for data, which will trigger roaming charges on your home plan.
Choosing the right eSIM plan before you travel also prevents replacement headaches. The best eSIM for global travel guide from Esimglobe covers how to select plans that minimize the risk of mid-trip connectivity loss.
How do you troubleshoot common travel SIM replacement issues?
Most replacement problems fall into a short list of categories. Knowing the fix before the problem hits keeps a minor inconvenience from becoming a full connectivity outage.
Delayed physical SIM delivery
Mail delivery to hotels is unreliable in many countries. The hotel may hold the package at the front desk without notifying you, or customs may delay international shipments. Always ask the carrier for a tracking number and check it daily. If delivery is taking more than two days, call the carrier and ask about local pickup alternatives.
Activation errors after SIM insertion
If your new physical SIM shows “No Service” after insertion, the most common cause is that the carrier has not yet registered the new card on their network. Wait 15 minutes, then restart your phone. If the problem persists, call the carrier’s activation line directly. Do not assume the SIM is defective after the first attempt.
QR code reuse restrictions
Deleting an eSIM profile without saving the QR code forces you to request a new one from the provider. That process requires identity verification and can take hours. Never delete an eSIM profile unless you have the QR code saved or a confirmed replacement ready.
Device locking issues
If your replacement SIM or eSIM profile fails to connect after activation, your device may still be carrier-locked. Confirming unlocked status before travel is the top prevention measure. If you discover the lock mid-trip, contact your home carrier and request a remote unlock. Most carriers complete remote unlocks within 24 hours.
eSIM inaccessible after device failure
If your phone screen breaks or the device becomes unresponsive, the embedded eSIM cannot be extracted. The provider must reissue a QR code, a process that requires valid ID verification and can take multiple days. This is the strongest argument for keeping a physical SIM as a backup during any critical trip.
“Replacement is faster than a refund and preserves your phone number and data plan continuity.” This principle from eSIM troubleshooting guidance applies every time you face a connectivity failure abroad. Always request a replacement first before pursuing a refund.
Pro Tip: Carry a spare physical SIM from your home carrier or a local prepaid SIM purchased at your destination as a backup. If your eSIM fails and re-provisioning takes 48 hours, that spare SIM keeps you connected.
For a deeper look at eSIM facts every traveler should know before departure, Esimglobe’s resource library covers device compatibility, profile management, and plan selection in detail.
Key Takeaways
The travel SIM card replacement process requires preparation before departure, clear knowledge of physical SIM versus eSIM procedures, and a backup connectivity plan for device failure scenarios.
| Point | Details |
|---|---|
| Unlock your device first | Carrier unlocking is the top failure point; confirm it before you leave home. |
| eSIM re-provisioning is faster | eSIM replacement takes minutes versus days for physical SIM mail delivery. |
| Save your QR code | Store your eSIM QR code in cloud backup; deleting the profile without it forces a new request. |
| Keep a physical SIM backup | If your device fails abroad, an embedded eSIM is inaccessible until the provider reissues a code. |
| Install eSIM before departure | Activating your travel eSIM at home avoids unreliable airport Wi-Fi during setup. |
What I have learned from years of managing travel SIMs
The conventional wisdom says eSIM is the future and physical SIM is obsolete. I disagree with that framing, at least for 2026.
eSIM technology has genuinely changed international travel for the better. Instant activation, no card swapping, and the ability to hold multiple profiles on one device are real advantages. Providers like Esimglobe have made the purchasing and activation process fast enough that most travelers can be connected within minutes of landing. That is a meaningful improvement over hunting for a SIM kiosk in an unfamiliar airport.
But the physical SIM backup argument is not nostalgia. It is risk management. I have seen travelers lose connectivity for two full days because their phone screen cracked and the carrier needed 48 hours to reissue a QR code with proper ID verification. A $15 prepaid SIM purchased before departure would have solved that problem in five minutes.
The other misconception I see constantly is that travelers assume their device is unlocked because they bought it outright. Many carriers lock devices even when purchased at full price. Checking unlock status takes two minutes in your phone settings. Skipping that check and discovering the lock at the airport is a completely avoidable problem.
My practical recommendation for 2026: use an eSIM from a provider like Esimglobe as your primary travel data connection, and carry a local prepaid physical SIM as your emergency backup. The eSIM purchasing tips Esimglobe publishes for international travelers are worth reading before any trip longer than a week. That combination gives you the speed and flexibility of eSIM with the physical redundancy that device failures demand.
— daniele
Get connected fast with Esimglobe
Esimglobe provides eSIM plans for over 190 countries, with activation that takes minutes and profiles you can install before you leave home.

For travelers heading to Asia, the Asia Unlimited Day Pass covers 20 areas with unlimited data, making it one of the most flexible regional options available. Unlike providers that leave you waiting on hold or navigating confusing refund policies, Esimglobe’s support team prioritizes replacement over refunds to keep your connection active. Plans are available in USD, EUR, and GBP, with a straightforward activation process that works on all major eSIM-compatible devices. Explore Esimglobe’s full range of travel eSIM options and get your profile ready before your next departure.
FAQ
What is the first step in the travel SIM card replacement process?
Contact your carrier immediately by phone or online portal to report the lost or damaged SIM and request a replacement. Have your account credentials and a backup authentication method ready before you call.
Can I reuse my eSIM QR code after re-provisioning?
No. eSIM QR codes are single-use, and scanning the same code twice will fail. Always save your QR code to cloud storage before travel, and request a new code from your provider if the original is lost.
How long does physical SIM replacement take when traveling abroad?
Delivery by post typically takes two to five days depending on your location. In-store pickup through carrier retail partners in major cities can reduce that to the same day.
Do I need to be carrier-unlocked to replace my travel SIM?
Yes. A carrier-locked device will reject any SIM or eSIM profile from a different provider. Confirm your unlock status in your phone settings before departure to avoid delays during replacement.
Is eSIM replacement faster than physical SIM replacement?
Yes. eSIM re-provisioning takes minutes once the provider issues a new QR code, compared to days for physical SIM mail delivery. The exception is device failure, where eSIM re-provisioning can take multiple days due to ID verification requirements.