
TL;DR:
- Using a Tokyo eSIM allows travelers to avoid high roaming fees by downloading a digital SIM profile before boarding. It requires compatible, unlocked devices and prior purchase on stable Wi-Fi to ensure quick activation upon arrival. SoftBank and KDDI networks offer the most reliable coverage across Tokyo, while app-based services like LINE and Google Maps enhance connectivity.
Planning a trip to Tokyo and dreading the roaming bill? You are not alone. Most international travelers land at Narita or Haneda and face a choice between paying $10 or more per day in carrier roaming fees or joining the queue at an airport SIM counter. An eSIM for Tokyo cuts both problems entirely. The embedded SIM (eSIM) is a digital SIM profile you download directly to your phone before you board, giving you local network access the moment you land. This guide covers every step: what your phone needs, how to buy and activate, what to do when things go wrong, and how to use your Tokyo eSIM for transit payments.
Table of Contents
- Key takeaways
- What you need before getting an eSIM Tokyo
- How to buy and activate an eSIM in Tokyo
- Fixing common eSIM activation problems in Tokyo
- Making the most of your Tokyo trip with an eSIM
- My honest take on using an eSIM in Tokyo
- Get connected in Tokyo with Esimglobe
- FAQ
Key takeaways
| Point | Details |
|---|---|
| Check device compatibility first | Confirm your phone is eSIM-capable and carrier-unlocked before purchasing any Tokyo eSIM plan. |
| Buy and install before departure | Download your eSIM profile at home on stable Wi-Fi to avoid activation delays at the airport. |
| Turn data roaming on | Even local eSIM profiles in Japan require data roaming to be enabled in your phone settings. |
| Choose SoftBank or KDDI networks | These two carriers deliver the best coverage in dense Tokyo urban areas and transit zones. |
| Use apps for calls and messaging | Most Japan eSIM options are data-only, so rely on WhatsApp or LINE for voice and text. |
What you need before getting an eSIM Tokyo
Before you spend a single dollar on a Tokyo eSIM plan, run through this checklist. Skipping it causes most of the problems travelers report.
Device compatibility and carrier lock
Your phone must support eSIM technology. Most flagship devices released after 2018 do, including iPhone XS and later, Google Pixel 3 and later, and Samsung Galaxy S20 and later. The requirement that catches travelers off guard is carrier lock. If your phone is still locked to your home carrier, a foreign eSIM profile will not activate. Contact your carrier and request an unlock at least a few days before your trip.
Japan’s mobile networks operate on specific frequency bands. Most modern international smartphones support the relevant bands (including Band 1, Band 3, and Band 28 used by Japanese carriers), but older devices from certain regions may not. Check your phone’s spec sheet against the bands used by SoftBank, KDDI, or NTT Docomo.
ID requirements and registration
ID requirements vary by provider. Physical SIM cards in Japan require in-person passport verification. Many eSIM providers for Tokyo travelers skip or simplify this step, letting you buy remotely and activate without visiting a store. This is one of the clearest advantages of choosing an eSIM over a physical SIM card for your trip.
Essential requirements at a glance
| Requirement | What to check |
|---|---|
| eSIM-capable device | Check phone model specs or Settings > General > About |
| Carrier unlock | Contact your carrier 3 to 5 days before departure |
| Stable Wi-Fi | Needed to download and install the eSIM profile |
| Supported frequency bands | Verify Band 1, 3, and 28 compatibility |
| ID documents | Passport required for most Japan SIM purchases |
| QR code from provider | Delivered by email after purchase |
Pro Tip: Do not install your eSIM profile over hotel or café Wi-Fi. Use your home network before you travel for the most reliable download experience.
How to buy and activate an eSIM in Tokyo
This is where most guides get vague. Here is the actual process, step by step.
Choosing the right plan
Tokyo eSIM plans vary by data allowance, validity period, and the network they run on. A short trip of three to five days typically needs 3 to 5 GB of data for standard navigation, messaging, and occasional video. A two-week trip with heavy Google Maps use will benefit from a 10 GB or unlimited plan. Pay attention to whether the plan supports mobile hotspot sharing, since many budget plans restrict tethering.
The network your eSIM runs on matters. Network choice impacts speed significantly in dense Tokyo areas. SoftBank and KDDI deliver the most consistent performance in central Tokyo, while some international eSIM brands use less reliable wholesale networks that throttle speeds after a few gigabytes.
Where to buy
Online platforms let you purchase and receive your QR code by email within minutes. Buying before you travel means you can activate your eSIM on your home Wi-Fi and arrive in Tokyo fully connected. Buying at the airport is possible through vending machines or counters, but it costs more and wastes travel time.
Esimglobe offers Japan eSIM plans with straightforward purchasing, no excessive ID hurdles, and reliable network access backed by major Japanese carriers.
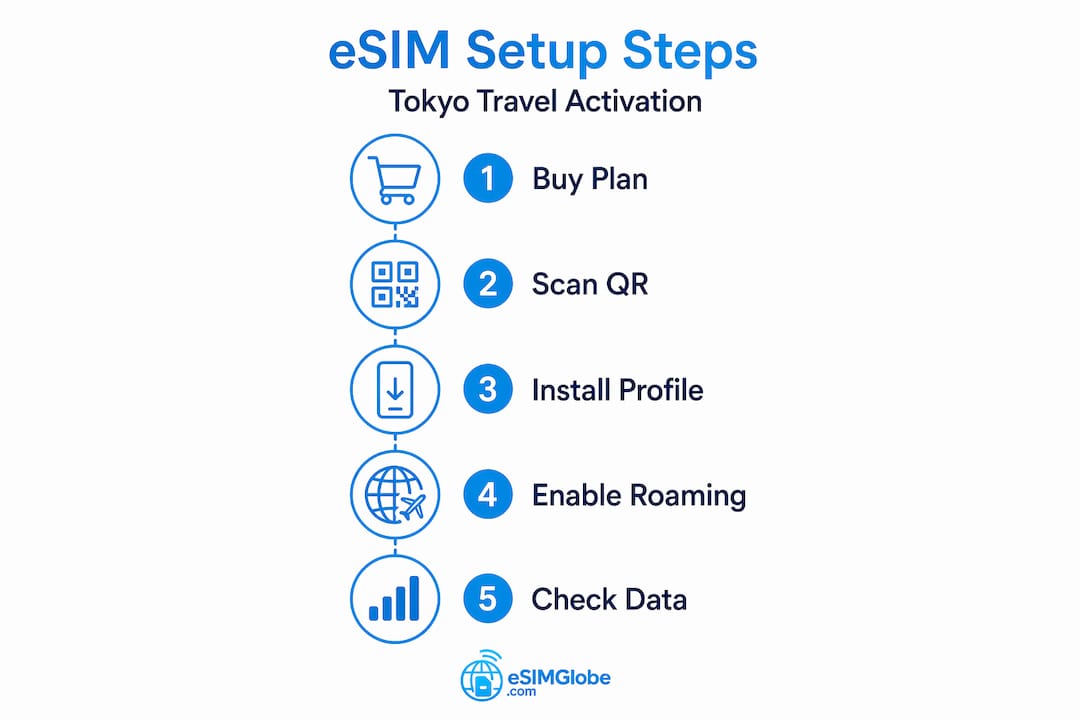
Step-by-step installation on iPhone
- Open Settings and tap Cellular (or Mobile Data depending on iOS version).
- Tap Add Cellular Plan.
- Point your camera at the QR code from your provider.
- Confirm the plan label when prompted, then tap Done.
- Under Cellular, select your new Tokyo eSIM as the Primary data line.
- Toggle Data Roaming to ON under your eSIM line settings.
- Restart your phone to finalize the connection.
Step-by-step installation on Android
- Open Settings and navigate to Connections or Network & Internet.
- Tap SIM Card Manager or SIM Manager, then Add Mobile Plan.
- Scan the QR code provided by your eSIM provider.
- Follow on-screen prompts to confirm and activate.
- Set the new eSIM as your preferred data line.
- Enable Data Roaming for the eSIM line.
- Restart the device.
Activation completes within minutes once the profile is downloaded and data roaming is switched on.
Provider comparison overview

| Provider type | Network used | Hotspot support | Typical price range |
|---|---|---|---|
| Esimglobe Japan eSIM | SoftBank / KDDI | Yes (plan dependent) | $8 to $25 USD |
| Local airport SIM counter | NTT Docomo | Yes | $20 to $45 USD |
| Generic international eSIM brands | Varies, often slower | Limited | $5 to $30 USD |
| Carrier roaming (home plan) | Varies | Often restricted | $10+ per day |
Pro Tip: Purchase your eSIM at least 24 hours before your flight. Some providers queue activation requests and a last-minute purchase can leave you without data during the first hour of your trip.
Fixing common eSIM activation problems in Tokyo
Even a well-purchased eSIM can hit snags. The good news: almost every problem has a fast fix.
Troubleshooting follows a clear order. Work through this list before contacting support:
- Data roaming is off. This is the number one cause of a non-working Tokyo eSIM. Data roaming must be enabled even for locally purchased profiles in Japan. Go to Settings > Cellular > your eSIM line > Data Roaming and flip the toggle on.
- Wrong data line selected. If your phone has two lines (your home SIM and the Tokyo eSIM), you must set the eSIM as the active data line, not just the secondary line.
- QR code already scanned once. Most QR codes are single-use. If you scanned it and the installation failed midway, you need a fresh code from your provider. Contact support immediately.
- Wi-Fi not available during installation. You cannot download an eSIM profile without an internet connection. If you are at the airport, connect to the free terminal Wi-Fi first.
- Manual APN settings needed. Some providers require you to manually enter APN settings. These are usually emailed with your QR code. On iPhone: Settings > Cellular > Cellular Data Network. On Android: Settings > Network > Mobile Networks > Access Point Names.
- Profile installed but no signal. Open Settings and check if the eSIM line shows “No Service.” Tap the line and select the carrier manually. Choosing SoftBank or KDDI manually often resolves the issue in central Tokyo.
- Phone not restarted after installation. A restart is not optional. It forces the device to register with the local network.
Pro Tip: If you land at Narita and your eSIM shows no signal, connect to the airport free Wi-Fi, go to Settings and delete then reinstall the eSIM profile using your original QR code email. This fixes a surprising number of incomplete installations.
One thing most guides skip: regional phone settings can interfere with eSIM connectivity on certain Android models. If your phone is set to a region that does not recognize the Japanese carrier frequencies, switch device region to Japan temporarily under Settings > General > Language & Region.
Making the most of your Tokyo trip with an eSIM
Staying connected in Tokyo is only part of the story. Here is how to squeeze more value out of your eSIM setup on the ground.
Transit payments with Mobile Suica
Tokyo’s transit system runs on IC cards, and the most convenient option for iPhone users is Mobile Suica. There is a catch: setting your phone region to Japan is necessary to add Mobile Suica on iPhone 8 and later devices. The process involves temporarily switching your Apple ID region to Japan in App Store settings, downloading Suica, topping it up with a card, then switching your region back if needed. Your eSIM data connection makes this process much faster since you do not need to hunt for Wi-Fi.
Android users have a smoother experience. Google Pay supports Suica natively in recent versions, and the setup does not require a region change.
Apps that work best with a Tokyo eSIM
- Google Maps: The most reliable navigation tool in Tokyo, including real-time train schedules and walking directions to specific building floors.
- LINE: Japan’s dominant messaging app. Many local businesses, restaurants, and tour operators communicate through LINE rather than email or SMS.
- WhatsApp: Good for staying in touch with international contacts when most Japan eSIMs are data-only and do not include voice or SMS.
- Uber and GO (taxi app): Both work well in Tokyo with a data connection. GO is the local app with broader taxi availability outside central wards.
- Google Translate: The camera mode handles Japanese signage in real time, which makes ordering food and reading transit signs far less stressful.
Practical tips for connectivity on the ground
- Keep some cash and a backup payment card. A handful of smaller shops and some konbini vendors do not accept contactless payment, regardless of your eSIM or Suica setup.
- If you plan to work remotely from Tokyo, test your hotspot function on the first day. Some plans advertise tethering but throttle speeds heavily above a certain threshold.
- Tokyo’s subway stations and major streets have solid 4G and 5G coverage. Rural day trips to areas like Nikko or Hakone can have weaker signals, so download offline maps before you leave the city.
- Staying in a central Tokyo location makes a meaningful difference in signal quality. Accommodations in Shinjuku, Shibuya, or Ginza sit on top of dense carrier infrastructure.
My honest take on using an eSIM in Tokyo
I have watched travelers make the same mistakes with Tokyo eSIMs for years, and the pattern is consistent. People spend time comparing prices down to the dollar but then forget to check whether their phone is carrier-unlocked. They arrive in Japan with a perfectly purchased eSIM and spend the first two hours of their trip troubleshooting something that would have taken five minutes to verify at home.
The timing of activation genuinely matters more than most guides acknowledge. I always recommend installing the profile on home Wi-Fi the night before departure, not at the airport. The airport free Wi-Fi is unstable, crowded, and sometimes filtered in ways that interrupt eSIM downloads.
On network selection: in my experience, plans tied to SoftBank or KDDI perform noticeably better across central Tokyo than plans running on lesser-known wholesale networks. The difference shows up in the Shinjuku and Shibuya subway concourses where cell congestion is high. A cheap plan on a slower network will frustrate you exactly when you need directions most.
The ID registration piece catches people off guard. Many travelers assume that buying a Japanese SIM at the airport is quick. The reality is that local provider eSIMs and physical SIMs require ID verification, and some counters have wait times. Purchasing through a platform like Esimglobe before you travel completely sidesteps this friction.
My honest recommendation: do not overthink it. Pick a plan with at least 5 GB on a SoftBank or KDDI network, buy it a day before you fly, install it on your home Wi-Fi, and turn data roaming on when you land. That covers 95% of travelers with zero complications.
— daniele
Get connected in Tokyo with Esimglobe
Planning mobile data for a Tokyo trip should take ten minutes, not two hours of comparison research. Esimglobe makes the process straightforward: browse Japan eSIM plans, pick your data allowance and duration, purchase with your preferred currency, and receive your QR code by email within minutes.

Esimglobe’s Japan eSIM plans run on major Japanese carrier networks, support hotspot on qualifying plans, and come with no excessive ID requirements that slow down the buying process. If you are also planning travel beyond Japan, Esimglobe covers destinations worldwide, including options like Maldives eSIM plans with the same simple purchase flow. For broader tips on staying connected abroad without overpaying, the eSIM travel tips guide on Esimglobe covers the essentials across multiple destinations. One platform, one account, and mobile data sorted before you board.
FAQ
What devices support eSIM for Tokyo travel?
Most flagship smartphones released after 2018 support eSIM, including iPhone XS and newer, Google Pixel 3 and newer, and Samsung Galaxy S20 and newer. Your device must also be carrier-unlocked to activate a foreign eSIM profile.
Do I need to turn on data roaming for a Tokyo eSIM?
Yes. Data roaming must be enabled even for locally purchased eSIM profiles in Japan. Without it, your eSIM will show no signal regardless of how correctly the profile was installed.
Is an ID required to buy an eSIM for Japan?
Physical SIM purchases in Japan require passport verification at the point of sale. Many international eSIM providers, including Esimglobe, allow remote purchase without in-person ID checks, making the process faster for travelers.
Which Japanese network is best for Tokyo coverage?
SoftBank and KDDI deliver the most reliable coverage in dense Tokyo areas including major transit hubs and busy city wards. Choosing an eSIM plan that runs on one of these two carriers reduces the chance of connectivity issues in crowded zones.
Can I use Mobile Suica with my Tokyo eSIM?
Yes, but iPhone users need to temporarily set their phone region to Japan to add Mobile Suica through the App Store. Android users can add Suica through Google Pay without changing region settings. Your eSIM data connection is used during the setup and top-up process.