






















Toggle Airplane Mode off and on, confirm the eSIM line is switched on in Settings, and restart your phone. Those three steps resolve the majority of eSIM no-service situations quickly. If the eSIM is still not connecting after that, the issue is almost always one of four things: the line is off, activation never completed on the carrier side, APN settings failed to auto-configure, or the device is carrier-locked.
Run these checks now:
- Toggle Airplane Mode on, wait briefly, toggle it off
- Go to Settings → Cellular (iPhone) or Settings → Network & Internet → SIMs (Android) and confirm the eSIM line is turned on
- Set the eSIM as the default data line
- Enable Data Roaming if you are traveling — data-only travel eSIMs often require this even inside the destination country due to partner-network configurations
If none of those work, gather your IMEI and EID (both are in Settings → General → About on iPhone, or Settings → About Phone on Android), note the exact error message text, and contact your carrier or Esimglobe support with that information ready.
Pro Tip: Before removing a stuck eSIM profile, ask your carrier or Esimglobe support to push a re-provision to the existing profile. A carrier push often restores a stuck activation without deleting the current profile, which means you avoid the risk of losing a QR code that can only be scanned once.
Key Takeaways
Most eSIM failures resolve with basic steps like toggling Airplane Mode, ensuring the line is on and default, and restarting. If those fail, the fix often involves APN correction, carrier re-provision, or profile reissue.
| Point | Details |
|---|---|
| Start with the fast checklist | Airplane Mode toggle, line on, default data line, Data Roaming on — resolves most cases in under three minutes. |
| APN is the hidden culprit | Auto-configuration fails on some devices; compare APN fields to your activation email before requesting a reinstall. |
| Gather IMEI and EID first | Both identifiers are required by carriers and Esimglobe support to re-provision a profile remotely. |
| Escalate in order | Try carrier re-provision before device reset; a profile push is often faster and usually avoids losing a single-use QR code. |
| Esimglobe support | For plans purchased through Esimglobe, open a ticket with order number, EID, error screenshot, and timestamp for fastest resolution. |
Contact your carrier when the issue involves account suspension, a carrier lock, or a hardware fault. Contact Esimglobe support when the issue involves profile delivery, QR code reissue, or activation log verification.
Table of Contents
- Why your eSIM keeps showing no service
- The 3-minute checklist to run before anything else
- How to fix eSIM issues on iPhone, step by step
- How to fix eSIM issues on Android, step by step
- How to remove, reinstall, or transfer an eSIM profile
- Carrier and account checks to run before blaming the phone
- Advanced checks: APN, network mode, and diagnostics
- When to contact carrier or device support
- How Esimglobe handles activations and what support can fix
- The mistakes that cause most repeat eSIM failures
- Esimglobe support for customers with an active plan
- Official guides and support pages to consult
- FAQ
Why your eSIM keeps showing no service
Most eSIM failures fall into one of eight categories. Matching the symptom to the cause saves time.
- Carrier lock — The device is locked to another carrier. Symptom: “SOS” or “No Service” immediately after install. On iPhone, check Settings → General → About → Network Provider Lock; “No SIM restrictions” confirms the device is unlocked.
- Unsupported device or OS — The phone model or software version does not support eSIM or the specific carrier’s provisioning system. Symptom: eSIM option missing from Settings entirely.
- Incomplete activation on the carrier side — The profile installed but the carrier never finished provisioning the line. Symptom: “Activating…” stuck for more than 15 minutes.
- Line switched off in Settings — The eSIM profile is present but the line is toggled off. Symptom: profile visible in Settings but showing “Turn On.”
- APN or network-mode mismatch — The device has signal but no data. This is one of the most common hidden causes, and it is frequently overlooked. APN settings are usually pushed automatically, but certain newer flagship models and some older devices fail to auto-configure them. When that happens, you have bars but no internet. Symptom: signal bars present, mobile data not loading.
- Carrier settings or OS out of date — An outdated carrier bundle can block provisioning. Symptom: activation error or no prompt to complete setup.
- Multiple SIM conflicts — Two active lines competing for the same network slot. Symptom: one line works, the other shows “No Service.”
- Account suspension or unpaid balance — The carrier has blocked the line at the account level. Symptom: call or data fails even after a successful install; carrier confirms the block when you call.
The 3-minute checklist to run before anything else
Work through these in order. Most eSIM issues resolve within a few basic steps.
- Toggle Airplane Mode on, count to five, toggle it off.
- Restart the phone completely (power off, power on — not just lock/unlock).
- Open Settings → Cellular (iPhone) or Settings → Network & Internet → SIMs (Android). Confirm the eSIM line shows as “On” and is set as the default for cellular data.
- Enable Data Roaming on the eSIM line if you are outside your home country.
- Check that the default data line is set to the eSIM, not a physical SIM.
- Confirm the OS is up to date (Settings → General → Software Update on iPhone; Settings → System → System Update on Android).
- Look for a carrier settings update prompt (iPhone: Settings → General → About — a prompt appears automatically if an update is available).
- Verify the eSIM profile is still present in Settings. If it has disappeared, you will need to reinstall.
If these steps do not fix it, record before calling support: IMEI number, EID number, the exact error message text (screenshot it), and the time the problem started.
How to fix eSIM issues on iPhone, step by step
The highest-probability iPhone fixes, in order: toggle the eSIM line, check carrier settings, restart, reset network settings, then remove and reinstall the profile.
Step-by-step iPhone troubleshooting
- Toggle the eSIM line. Settings → Cellular → tap the eSIM plan → toggle “Turn On This Line” off, wait 10 seconds, toggle it back on.
- Set as default data line. Settings → Cellular → Cellular Data → select the eSIM plan.
- Check for a carrier settings update. Settings → General → About. If an update is available, a prompt appears within a few seconds. Tap “Update.”
- Restart the device. Hold the side button and a volume button, slide to power off, wait 30 seconds, power on.
- Reset Network Settings. Settings → General → Transfer or Reset iPhone → Reset → Reset Network Settings. This clears stuck network registrations and forces a clean re-register with towers. Write down your Wi-Fi passwords first — this step removes all saved networks.
- Remove and reinstall the eSIM. Settings → Cellular → tap the plan → Remove Cellular Plan. Then reinstall using your QR code or SM-DP+ address. Note: some QR codes expire or are single-use. Confirm with your provider before removing an active profile.
- Run Apple Support diagnostics. The Apple Support app (available on the App Store) includes device diagnostics on iOS 18 and later that can identify whether the issue is hardware or software before you call Apple.
Common iPhone error messages and what they mean
- “Activating…” stuck — Carrier provisioning is incomplete. Wait 15 minutes, then restart. If still stuck, contact the carrier for a re-provision.
- “No Service” — Line is off, device is carrier-locked, or activation failed. Start at step 1 above.
- “Could not complete eSIM activation” — The QR code may be expired, already used, or linked to the wrong EID. Contact your provider for a new activation code.
How to find IMEI and EID on iPhone
Settings → General → About → scroll to IMEI and EID. Apple recommends having both ready when contacting a carrier, since carriers use the EID to re-provision a profile remotely. For eSIM activation on international travel, having these numbers copied before you board saves significant time.
Pro Tip: iPhone Quick Transfer (available when setting up a new iPhone) moves an eSIM from one device to another without a new QR code. Use it only when both phones are present and the carrier supports it. If you use Quick Transfer and the transfer stalls, the profile can end up in a limbo state on both devices — always have your carrier or provider’s support contact ready before starting.
How to fix eSIM issues on Android, step by step
The top Android fixes: turn the SIM line on, set network selection to automatic, check APN values, and update both the OS and any carrier app.
- Turn on the eSIM line. Settings → Network & Internet → SIMs → tap the eSIM → toggle on.
- Set as preferred for mobile data. Settings → Network & Internet → SIMs → select the eSIM as the preferred SIM for data.
- Set network selection to automatic. Settings → Network & Internet → Mobile Network → Network operators → Search automatically.
- Check and correct APN settings (see the APN section below for exact fields).
- Update the OS. Settings → System → System Update.
- Update any carrier app associated with the eSIM plan.
- Reset network settings. Settings → System → Reset Options → Reset Wi-Fi, Mobile & Bluetooth. Same caveat as iPhone: save Wi-Fi passwords first.
Vendor-specific menu paths
- Pixel: Settings → Network & Internet → SIMs. Google’s support pages document model-specific activation steps for Pixel phones, including how to add an eSIM via QR code or carrier app.
- Samsung: Settings → Connections → SIM Manager → Add eSIM. Samsung One UI labels differ slightly from stock Android; look for “SIM Manager” rather than “SIMs.”
- OnePlus/Other Android: Paths vary. If “SIMs” is not visible under Network & Internet, search “SIM” in the Settings search bar.
APN check for Android
APN settings are usually delivered automatically, but this auto-configuration fails on some devices — particularly newer flagship models that handle eSIM provisioning differently, and older phones with outdated baseband firmware. When it fails, you get signal but no data.
- Go to Settings → Network & Internet → Mobile Network → Advanced → Access Point Names.
- If the list is empty or shows a generic entry, you need to add the APN manually.
- Values to enter: APN name, APN address, username (often blank), password (often blank), MCC, and MNC. These values are in your activation email or provider portal.
Note on carrier apps: Some carriers push a fresh profile directly through their app. If your carrier has an app, open it and look for a “Manage eSIM” or “Re-provision” option before attempting a manual reinstall.
How to remove, reinstall, or transfer an eSIM profile
Reinstalling from a QR code (iPhone and Android)
- Screenshot or print the QR code before removing the existing profile.
- Remove the current profile: Settings → Cellular → plan name → Remove (iPhone) or Settings → Network & Internet → SIMs → plan → Remove (Android).
- Go to Settings → Cellular → Add Cellular Plan (iPhone) or Settings → Network & Internet → Download a SIM (Android).
- Scan the QR code. Hold the phone steady in good light; blurry scans fail.
- Follow the on-screen prompts. Keep Wi-Fi on during provisioning for stability.
Manual install using SM-DP+ address and activation code
If the QR code is unavailable, most providers supply an SM-DP+ server address and an activation code separately.
- iPhone: Settings → Cellular → Add Cellular Plan → Enter Details Manually.
- Android: Settings → Network & Internet → Download a SIM → Enter manually.
When to ask for a re-provision instead of reinstalling
Carriers and providers can push a clean profile to your device using your EID without requiring you to remove the existing one. This is faster and avoids the risk of losing a single-use QR code. Request a re-provision first; reinstall only if the re-provision fails.
Reinstall method comparison
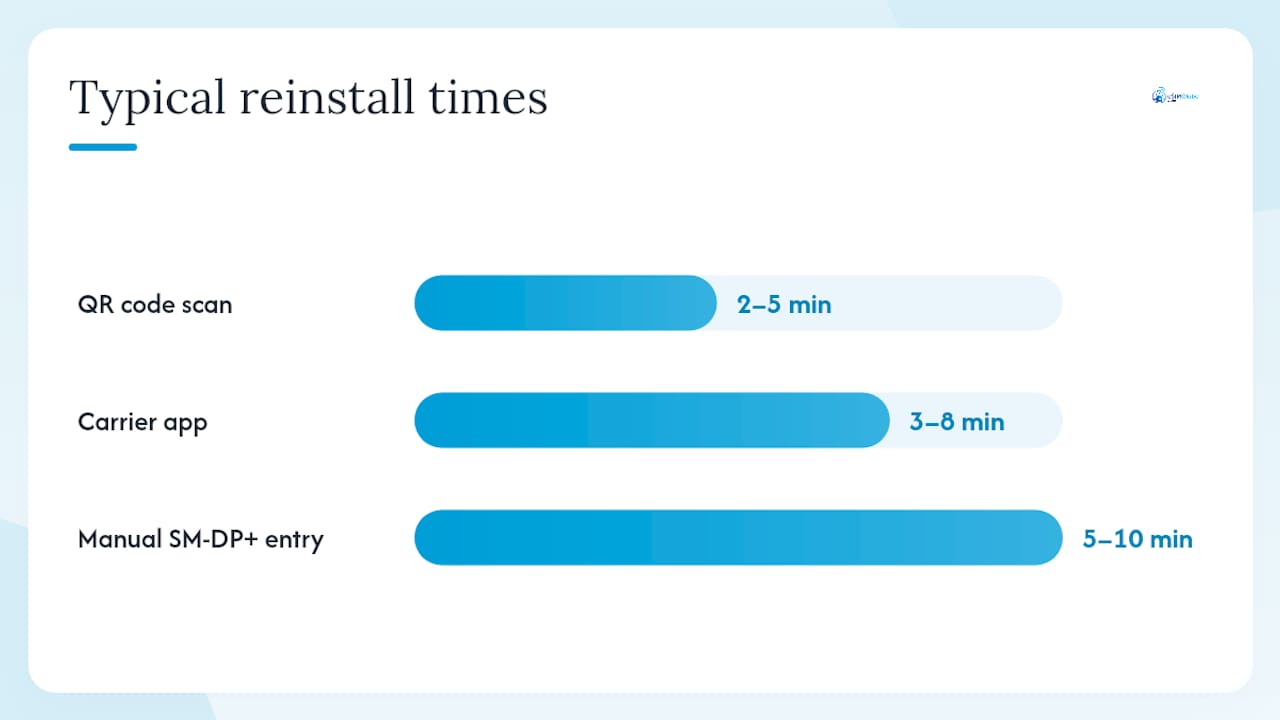
| Method | Best for | Risk | Typical time |
|---|---|---|---|
| QR code scan | First-time install or reissued code | Code expires or is single-use | 2–5 minutes |
| Carrier app | Carrier-managed plans with app support | App may not support all eSIM types | 3–8 minutes |
| Manual SM-DP+ entry | No QR code available | Typo in long address causes failure | 5–10 minutes |
Before any reinstall, screenshot: the current Settings → Cellular page showing the plan name, the error message, and the About page showing IMEI and EID. Support teams ask for all three.
Carrier and account checks to run before blaming the phone
Carriers can see things on their end that your phone cannot show you. Run through this list before concluding the device is at fault.
- Account is active and in good standing (no unpaid balance, no suspension, no fraud flag)
- The eSIM line is provisioned and active in the carrier’s billing system, not just in your Settings
- The correct phone model and EID are attached to the line in the carrier’s records
- No system blocks are active on the account
- A valid QR code or activation push is ready on the carrier portal
Carriers can verify provisioning status and network logs remotely. What they need from you: IMEI, EID, the exact error message, and the time the failure occurred.
Short support script: “My eSIM is installed but showing [exact error]. My EID is [number] and IMEI is [number]. Can you confirm the line is provisioned and active in your system, push a carrier settings update, and confirm the device is unlocked on your end?”
Advanced checks: APN, network mode, and diagnostics
Work through these in order when the quick checklist has not resolved the issue.
- Verify APN values. Compare every field in Settings against your activation email.
- Switch network mode. If the device is set to 5G-only and coverage is weak, drop to LTE/4G or Auto. Settings → Cellular → Cellular Data Options → Voice & Data (iPhone) or Settings → Network & Internet → Mobile Network → Preferred network type (Android).
- Reset Network Settings (if not already done). This clears stuck registrations without deleting the eSIM profile.
- Request carrier re-provisioning. Provide EID; the carrier pushes a clean profile. This is often faster than a full device reset.
APN field reference
| Field | What to enter |
|---|---|
| APN name | Provider name or plan name (from activation email) |
| APN | The APN address string (e.g., internet.provider.com) |
| Username | Blank in most cases; check activation email |
| Password | Blank in most cases; check activation email |
| MCC / MNC | Mobile country and network codes; match to destination country |
Diagnostics to capture for a support ticket: screenshot of Settings → Cellular (or SIMs), screenshot of APN settings, exact error message text, timestamp of failure, and whether Data Roaming is on or off.
When to contact carrier or device support
Escalate when: the quick checklist and a network settings reset have both failed, the account shows a suspension or block, or you suspect physical hardware damage.
What to prepare before calling
- IMEI and EID (Settings → General → About on iPhone; Settings → About Phone on Android)
- Screenshots of the Settings → Cellular page and the error message
- Exact error text and the time it first appeared
- Whether the issue started after an OS update, a travel departure, or a plan change
Escalation order
- Carrier re-provision — Fastest resolution for activation-stuck and “No Service” cases. Provide EID; carrier pushes a clean profile.
- Carrier settings push — Carrier sends updated network configuration to the device.
- Device maker diagnostics — Apple Support (via the Apple Support app or Apple Support website) for iPhone hardware questions; Google Support for Pixel-specific issues.
- Esimglobe support — For plans purchased through Esimglobe: profile reissue, QR code resend, EID verification, and activation log review. Esimglobe cannot override a carrier lock or fix a hardware fault, but can confirm whether the profile was correctly provisioned on its end and reissue the activation if needed.
How Esimglobe handles activations and what support can fix
Esimglobe delivers eSIM profiles instantly by email after purchase, via QR code or SM-DP+ address. Provisioning typically completes within minutes of scanning. For a full walkthrough of the global eSIM activation process, Esimglobe’s setup guide covers each step.
What Esimglobe support can do:
- Reissue a profile and resend the QR code or SM-DP+ address
- Verify the EID attached to your order and confirm activation log status
- Check whether provisioning completed on Esimglobe’s end
- Assist with plan selection for a replacement if the original plan cannot be recovered
What Esimglobe cannot change:
- Carrier locks on the device (a hardware/carrier restriction, not a profile issue)
- Account blocks on a carrier-owned line
- Physical hardware faults preventing eSIM chip recognition
What to include in an Esimglobe support ticket: order number, EID, screenshots of Settings showing the eSIM profile (or its absence), the exact error message, and the timestamp of the failure. Esimglobe offers 24/7 support for customers across 170+ countries.
The mistakes that cause most repeat eSIM failures
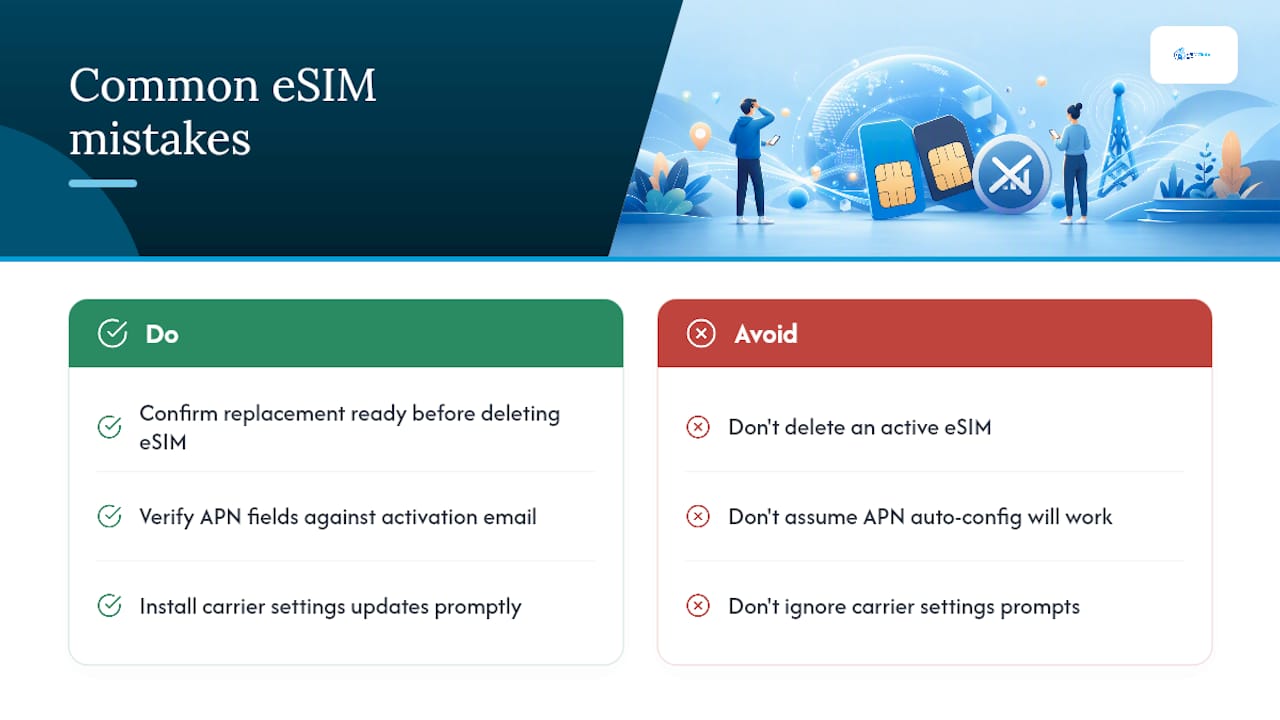
The single most common error: removing an active eSIM profile before confirming a replacement is ready. Many QR codes are single-use. Once you delete the profile and the code has already been scanned, you need the provider to reissue — which takes time you may not have at an airport.
The second most common: assuming APN auto-configuration always works. It usually does. But on certain newer flagship models and some older devices, the APN is not pushed automatically, leaving the device with signal and no data. Checking the APN fields against the activation email takes 90 seconds and fixes this without a profile reinstall.
The third: ignoring carrier settings update prompts. That small banner in Settings → General → About is not cosmetic. An outdated carrier bundle can block provisioning entirely.
Pro Tip: Before requesting a new profile from any provider, open Settings and verify every APN field against your activation email. Correcting a single wrong field — often the APN address itself — resolves “signal but no data” more often than a full profile reinstall does.
Esimglobe support for customers with an active plan
Esimglobe covers prepaid eSIM data plans for 170+ countries, with instant delivery by email and 24/7 support. If your eSIM is not working and you purchased through Esimglobe, the support team can reissue your profile, resend your QR code, and verify your activation status, typically without needing a full reinstall.
For U.S.-based travelers and international users, Esimglobe’s support team is reachable around the clock. To open a ticket, visit Esimglobe and use the support chat or contact form. Include your order number, EID, a screenshot of the error, and the exact time the issue started. That information lets the team act immediately rather than spending the first exchange collecting details. For travelers who want to avoid activation problems before departure, the eSIM purchasing tips for international travelers guide covers what to verify before you leave.
Official guides and support pages to consult
- Apple Support — For iPhone-specific eSIM setup steps, finding IMEI/EID, and carrier settings updates. Search “set up eSIM” on support.apple.com.
- Google Support — For Pixel-specific eSIM activation steps and model-specific menu paths. Search “add eSIM” on support.google.com.
- Esimglobe — For profile reissue, QR code resend, and activation log checks for plans purchased through Esimglobe. Visit Esimglobe and use the support contact form.
- Apple Support app — Available on the App Store; includes device diagnostics on iOS 18 and later that help identify whether an eSIM problem is hardware or software before you call Apple.
FAQ
Why is my eSIM showing no service after installation?
The most common causes are the eSIM line being toggled off in Settings, incomplete activation on the carrier side, or a carrier-locked device. Toggle Airplane Mode, confirm the line is on, and restart — if “No Service” persists, contact your carrier with your EID for a re-provision.
Why does my eSIM have signal but no mobile data?
APN misconfiguration is the most frequent cause. APN settings are usually automatic, but some devices fail to receive them. Go to Settings → APN (Android) or check with your carrier (iPhone), compare every field to your activation email, and correct any mismatch.
Why won’t my phone let me add an eSIM?
The device may be carrier-locked, running an unsupported OS version, or the eSIM chip may already hold the maximum number of stored profiles. On iPhone, check Settings → General → About → Network Provider Lock; “No SIM restrictions” confirms the device is unlocked and compatible.
How can I tell if my eSIM is broken or just misconfigured?
A misconfigured eSIM shows a profile in Settings but displays “No Service,” “Activating,” or “No Data.” A hardware fault typically means the eSIM option is missing from Settings entirely or the device cannot scan any QR code. Run the Apple Support app diagnostics (iOS 18+) or contact Google Support for Pixel hardware checks before concluding the chip is faulty.