






















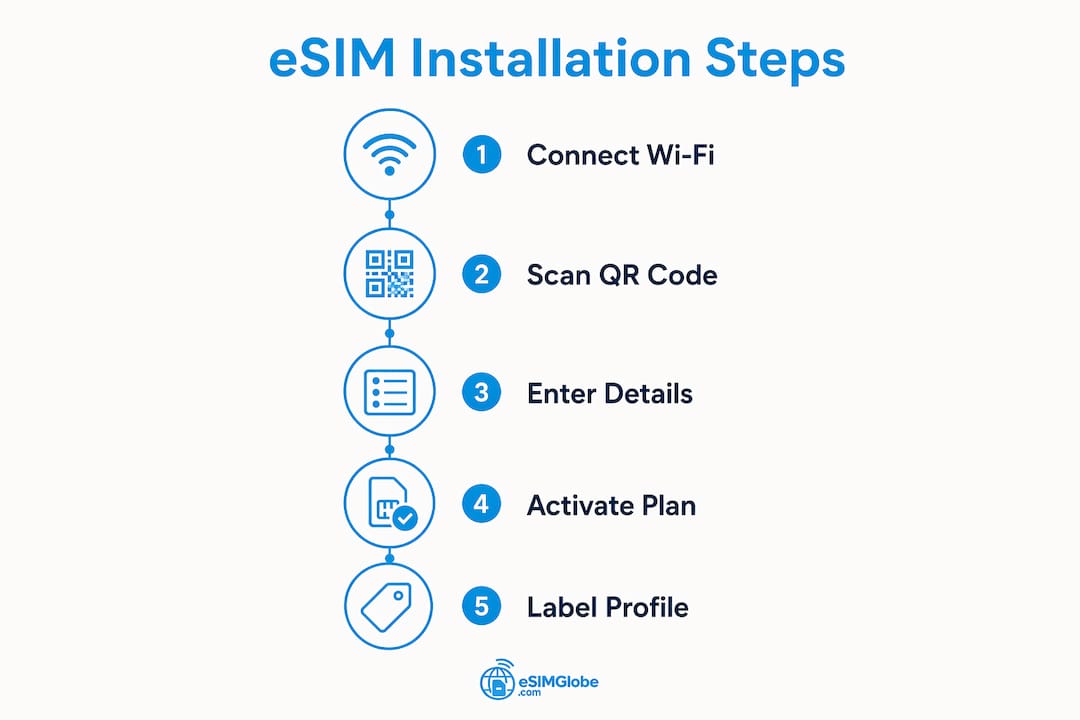
Installing an eSIM means activating a cellular plan digitally on your device without a physical SIM card. On iPhone: go to Settings > Cellular > Add Cellular Plan, then scan the QR code your carrier provided. On Android: go to Settings > Network & Internet > SIMs > Add eSIM, then scan the same QR code or enter the activation details manually. A stable Wi-Fi connection is required throughout the process.
Key steps at a glance:
- Confirm your device supports eSIM and your carrier offers eSIM activation
- Connect to Wi-Fi before starting
- Locate the QR code or activation credentials from your carrier
- Navigate to Cellular (iPhone) or Network & Internet / SIM Manager (Android)
- Scan the QR code or enter the SM-DP+ address and activation code manually
- Confirm the download and set the new plan as your default data line
- Enable Data Roaming if you are using a travel eSIM on a partner network
After installation, you can switch between profiles or delete unused ones through the same Cellular or Mobile Data settings menu.
Table of Contents
- What is eSIM, and which devices support it?
- How to install an eSIM on iPhone
- How to configure an eSIM on Android devices
- Troubleshooting eSIM installation problems
- Esimglobe’s guidance for a smooth eSIM installation
- Esimglobe: global eSIM plans for every destination
- Key Takeaways
- FAQ
What is eSIM, and which devices support it?
An eSIM (embedded SIM) is a programmable chip soldered directly into your device. It replaces the physical nano-SIM tray entirely on some models, and works alongside it on others. You manage carrier profiles via software rather than swapping plastic cards.
The practical benefits are real: you can store multiple carrier profiles, switch plans without visiting a store, and add a local data plan the moment you land in another country.
Compatible iPhone models:
- compatible iPhone models starting from iPhone XS
- newer iPhone models including 11 series
- recent iPhone SE models
- recent iPhone models including 12 series and later
- certain newer iPhone models have eSIM without physical SIM tray
Compatible Android devices (partial list):
- Google Pixel models starting from Pixel 3
- Samsung Galaxy S series starting from S20 for most models
- Samsung Galaxy Z Fold and Z Flip series
- Motorola Razr models
- select compatible models from OnePlus, Oppo, and Xiaomi
Carrier support is a separate requirement. Your device can be eSIM-capable, but if your carrier has not enabled eSIM provisioning, activation will fail. In the US, major carriers including Verizon, AT&T, and T-Mobile all support eSIM. Regional limitations exist in some countries, so confirm local carrier support before purchasing a plan.
How to install an eSIM on iPhone
Apple offers five distinct methods for eSIM activation, depending on your iOS version and carrier.
Method 1: QR code scan (most common)
- Open Settings > Cellular > Add Cellular Plan
- Point your camera at the carrier QR code
- Tap Add Cellular Plan when prompted
- Choose whether to use the new plan for cellular data, calls, or both
- Label the plan (e.g., “Travel” or “Work”) for easy identification
Method 2: Carrier app activation
Some US carriers, including Verizon, allow activation entirely within their official app. Download the carrier app, sign in, and follow the in-app prompts to push an eSIM profile directly to your device.
Method 3: Manual entry
If the QR code will not scan, tap Enter Details Manually on the Add Cellular Plan screen. Your carrier provides an SM-DP+ address and an activation code. Enter both exactly as shown.
Method 4: Transfer from another iPhone
Go to Settings > Cellular > Add Cellular Plan > Transfer from Nearby iPhone. Both devices must be on the same Wi-Fi network. This method works for moving an existing line, not for activating a new plan.
Method 5: Activation via email or link (iOS 17.4+)
On iOS 17.4 and later, carriers can send an eSIM activation link by email or text. Tapping the link opens the installation prompt directly without needing to scan anything.
Common iPhone installation issues:
- QR code not recognized: clean the camera lens, increase screen brightness on the device displaying the code, and retry
- “Plan not supported” error: your iPhone may be carrier-locked; contact your current carrier to unlock it
- Activation stuck at “Downloading”: reboot the device while staying on Wi-Fi, then reopen Settings > Cellular
Pro Tip: Label every eSIM profile immediately after installation. iPhone allows custom names, and clear labels like “Home AT&T” or “Europe Travel” prevent confusion when you are managing two or more active lines.
How to configure an eSIM on Android devices

The menu path varies by manufacturer, but the core process is consistent across Google Pixel, Samsung Galaxy, and most other Android phones.
Google Pixel
- Open Settings > Network & Internet > SIMs
- Tap the + icon or Add eSIM
- Select Download a SIM instead
- Scan the carrier QR code or tap Enter it manually to input the SM-DP+ address and activation code
- Tap Activate and wait for the profile to download
- Set the new eSIM as your preferred data SIM when prompted
Samsung Galaxy
- Open Settings > Connections > SIM Manager
- Tap Add eSIM or Add mobile plan
- Scan the QR code or enter credentials manually
- Confirm the download and assign the line for calls, texts, or data
Other Android devices
Most other Android phones follow the Pixel path. Look for SIM Manager, Mobile Network, or Dual SIM & eSIM in Settings if the exact label differs. Some devices place eSIM options under About Phone > SIM Status.
Common Android installation issues:
- QR code scan fails: increase the brightness of the screen showing the code, or try scanning in better lighting
- “Activation failed” message: verify the activation code has not expired (most codes are single-use and time-limited)
- No data after installation: confirm the eSIM is set as the active data SIM under SIM Manager, not just installed
Pro Tip: On Samsung devices, the SIM Manager also controls which SIM handles outgoing calls and SMS. After adding an eSIM, check each assignment individually rather than assuming the new profile takes over automatically.
Troubleshooting eSIM installation problems
Most eSIM failures trace back to one of four causes: no Wi-Fi, a locked device, an expired activation code, or a profile conflict with an existing SIM.
Step-by-step diagnostic process:
- Confirm you are on a stable Wi-Fi network, not mobile data from another SIM
- Verify the device is carrier-unlocked (contact your current carrier if unsure)
- Check that the QR code or activation code has not already been used or expired
- Restart the device and attempt installation again from the beginning
- If two eSIM profiles are installed, deactivate one before activating the other
- Reset network settings as a last resort (Settings > General > Transfer or Reset iPhone > Reset > Reset Network Settings on iPhone; Settings > General Management > Reset > Reset Network Settings on Samsung)
Specific fixes by symptom:
- eSIM installed but no internet: go to Cellular (iPhone) or SIM Manager (Android) and confirm the eSIM is selected as the active data line. Enable Data Roaming if the plan uses partner networks.
- Cannot delete an eSIM profile: on iPhone, go to Settings > Cellular, tap the plan, scroll down, and tap Remove Cellular Plan. On Android, open SIM Manager, select the profile, and choose Delete.
- Switching between profiles not working: proper profile labeling and managing active cellular lines prevents conflicts. Rename profiles clearly and toggle only one line active at a time until the switch confirms.
For persistent failures, contact your carrier’s technical support directly. Verizon, for example, provides eSIM-specific support through its online chat and store staff. Apple Support covers device-side issues at support.apple.com. Keep your device IMEI number ready when you call.
Esimglobe’s guidance for a smooth eSIM installation
Esimglobe has identified several patterns where installations fail that standard carrier instructions do not address.
Pitfalls Esimglobe flags most often:
- Purchasing an eSIM plan before confirming the device is unlocked
- Scanning the QR code on the same device that displays it (the camera cannot focus on its own screen)
- Skipping the Data Roaming toggle on travel eSIMs, which causes data to fail even after a successful install
- Not labeling profiles, leading to accidental deletion of the wrong line
For travelers, the Data Roaming step is the single most overlooked setting. Without it enabled on the eSIM’s cellular data settings, the plan will show as active but deliver no data on partner networks abroad. Esimglobe’s eSIM travel tips cover this and other country-specific activation details.
Managing multiple profiles is straightforward once you adopt a consistent naming convention. Esimglobe recommends labeling by carrier and region (“Verizon US,” “Globe PH,” “Orange FR”) so the active line is always identifiable at a glance. Switching is then a matter of going to Cellular or SIM Manager, tapping the target profile, and setting it as the active data line.
Pro Tip: Before traveling, install and test the travel eSIM while still at home on Wi-Fi. Confirm data loads on the new profile, then switch back to your home SIM. When you land, the profile is already installed and switching takes under ten seconds.
Digital nomads and remote workers staying in accommodation that supports tech-forward guests can find additional setup guidance through resources like Fox Hostel’s digital nomad guide, which covers connectivity tools relevant to eSIM users on the road.
Esimglobe: global eSIM plans for every destination
Esimglobe offers digital eSIM profiles for destinations worldwide, with plans available in USD, EUR, and GBP. The platform is built for travelers, digital nomads, and anyone who needs reliable mobile data without a physical SIM card.
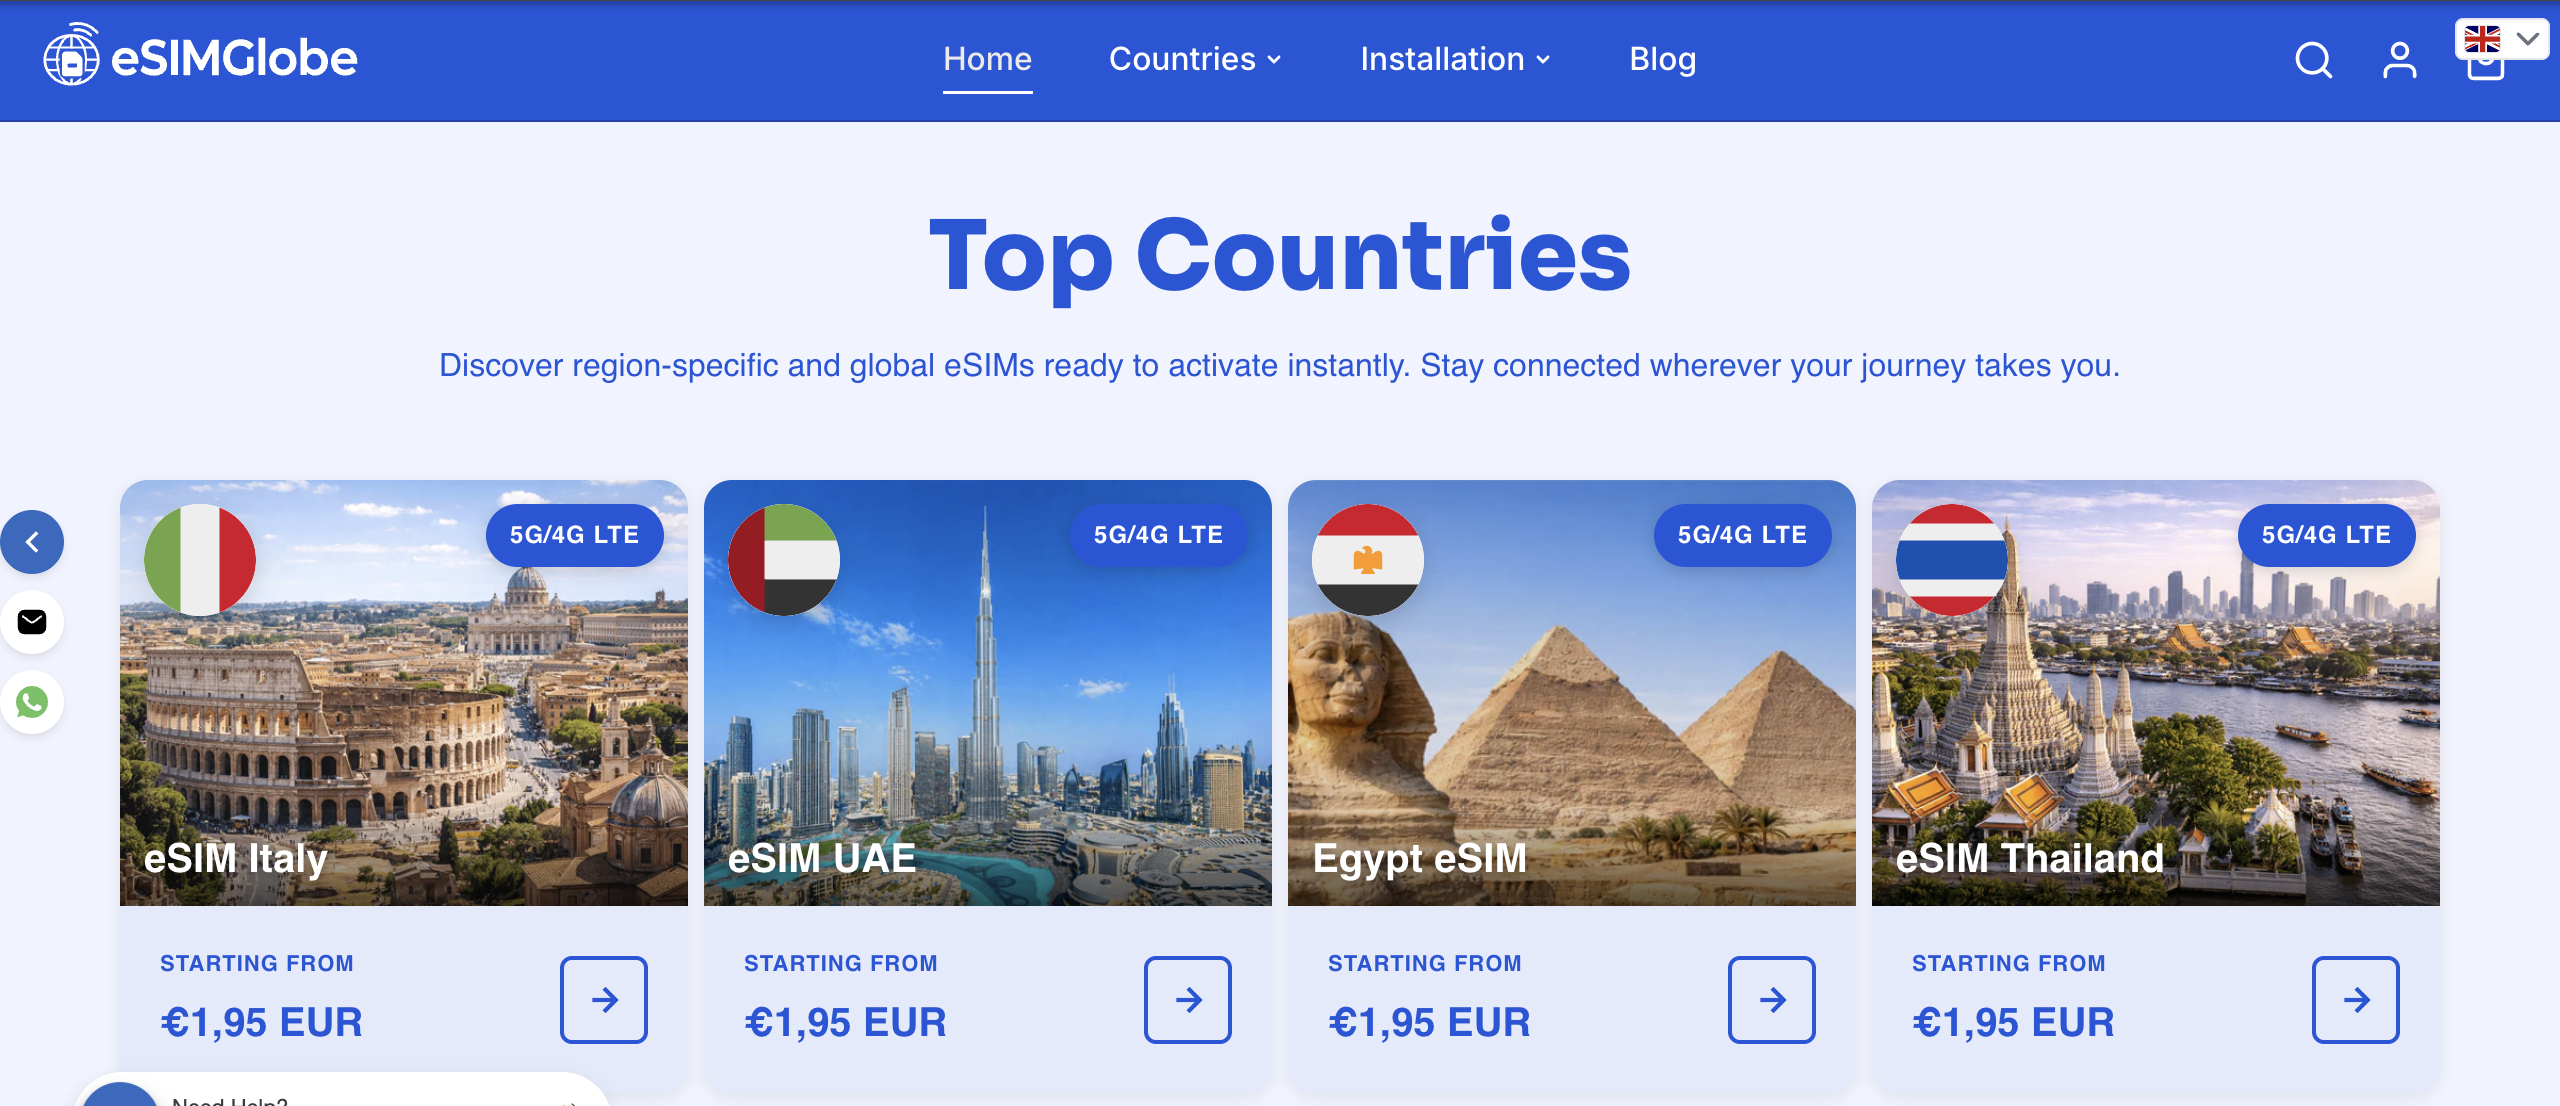
Plans cover individual countries and multi-region bundles. The interface supports multiple languages and lets you filter by destination, data volume, and validity period. No physical SIM shipping, no roaming surcharges from your home carrier, and no store visit required. You purchase, receive the QR code by email, and install using the steps in this guide.
For travelers preparing a full international eSIM workflow, Esimglobe’s plan pages include device compatibility notes and activation instructions specific to each carrier partner. Browse plans at esimglobe.com and have your eSIM ready before your next departure.
Key Takeaways
Installing an eSIM requires a Wi-Fi connection, an unlocked device, and a valid carrier QR code or SM-DP+ activation code entered through your device’s Cellular or SIM Manager settings.
| Point | Details |
|---|---|
| Wi-Fi is required | A stable Wi-Fi connection is critical throughout the entire eSIM download and activation process. |
| iPhone XS and later | All iPhone models from the XS onward support eSIM; US iPhone 14 and later are eSIM-only. |
| Three activation methods | QR code scan, carrier app, and manual SM-DP+ entry all work on both iPhone and Android. |
| Data Roaming must be on | Travel eSIMs on partner networks require Data Roaming enabled or data will not function after install. |
| Esimglobe for travel plans | Esimglobe provides global eSIM profiles with QR code delivery, covering destinations worldwide in multiple currencies. |
FAQ
What do you need before installing an eSIM?
You need a compatible, carrier-unlocked device, a stable Wi-Fi connection, and a QR code or SM-DP+ address plus activation code from your eSIM provider.
Can you have more than one eSIM installed at the same time?
Yes. Most modern iPhones and Android devices support multiple installed eSIM profiles, though typically only one or two can be active simultaneously for calls and data.
Why is my eSIM showing no internet after installation?
The eSIM profile may not be set as the active data line, or Data Roaming is disabled. Go to Cellular (iPhone) or SIM Manager (Android), confirm the eSIM is selected for data, and enable Data Roaming if the plan uses partner networks.
How do you delete an eSIM profile?
On iPhone, go to Settings > Cellular, tap the plan, then tap Remove Cellular Plan. On Android, open SIM Manager, select the profile, and choose Delete.
Does Esimglobe work on both iPhone and Android?
Yes. Esimglobe delivers eSIM profiles via QR code, which installs on any eSIM-compatible iPhone or Android device using the standard steps covered in this guide.