






















The fastest fix for most eSIM problems: connect to stable Wi-Fi, toggle Airplane Mode on and off, restart your phone, confirm the eSIM line is set as your active data line, and turn on Data Roaming if you’re abroad. This works on both iPhone and Android, and it lines up with what Apple and Google’s own support pages recommend as the first move.
Most eSIM failures aren’t hardware problems; they’re a stalled download, a skipped toggle, or a carrier server that hasn’t caught up yet.
Quick wins to try right now:
- Switch to Wi-Fi (skip public/airport networks)
- Toggle Airplane Mode on, wait 10 seconds, toggle off
- Restart the device completely
- Set the eSIM as your active data line and enable Data Roaming
Third-party troubleshooting guides that track recurring eSIM complaints consistently point to the same short list of root causes: QR code issues, weak network connectivity, carrier lock, an outdated OS, or a provisioning delay on the carrier’s end. A majority of installation failures clear up once you work through that basic checklist, before you ever need to contact support.
Key Takeaways
Most eSIM installation and activation failures resolve through a short sequence: stable Wi-Fi, an Airplane Mode toggle, a full restart, and confirming the eSIM is set as the active data line.
| Point | Details |
|---|---|
| Run the reset checklist first | Wi-Fi, Airplane Mode toggle, and a full restart resolve most installation and activation failures. |
| Treat QR codes as single-use | A previously scanned code will show as consumed; request a reissue instead of rescanning. |
| Give provisioning time | Server-side activation can take some time before it’s worth contacting support. |
| Check the data line, not just the signal | A successful install can still show “no internet” if the wrong line is set for data or the APN is missing. |
| Esimglobe supports reissues directly | Esimglobe provides 24/7 support that can reissue or re-push a profile when a code fails or a device changes. |
Table of Contents
- eSIM Common Installation Issues and How to Solve Them: The Reset Checklist
- Why Won’t My eSIM Install? Fixing QR and Download Errors
- What to Do When Activation Freezes or Fails
- Fixing “No Service” or “Connected but No Internet”
- Is Your Device Actually Compatible?
- Advanced Fixes for Persistent eSIM Problems
- When to Contact Provider Support
- Preventing eSIM Problems Before They Start
- Who’s Behind This Guide
- Steps to Remove and Reinstall an eSIM Profile Securely
- iPhone vs Android: Where the Troubleshooting Actually Differs
- Handling Dual SIM and Multiple eSIM Profile Conflicts
- Moving an eSIM Profile to a New Device
- How to Confirm Your eSIM Is Actually Active
- Security Considerations When Installing and Managing eSIMs
- Useful Sources
- What Actually Matters When an eSIM Won’t Cooperate
- Get Your Travel eSIM Sorted Before You Need to Troubleshoot
- FAQ
eSIM Common Installation Issues and How to Solve Them: The Reset Checklist
Run this sequence before touching any advanced settings. It resolves the majority of stuck installs and activation errors.
- Get on stable internet first. eSIM profiles download as a data file, and a weak or overloaded connection is a common cause of a failed install. Use home Wi-Fi or a personal hotspot, not shared or metered networks.
- Toggle Airplane Mode, then restart. Turn Airplane Mode on, wait ten seconds, turn it off. Then power the device down completely and back on. This forces your phone to re-register with the network from scratch.
- Check the eSIM line itself. Go into your cellular settings and confirm the new eSIM is toggled on and selected as the line for data. Turn off any active VPN, since some VPN configurations interfere with initial profile activation.
Pro Tip: Airport and hotel Wi-Fi often route through a captive portal login page that silently blocks the background download an eSIM install needs. If a profile download stalls with no clear error, that portal screen is usually why. Always install before you leave home, never after you land.
Why Won’t My eSIM Install? Fixing QR and Download Errors
An eSIM QR code is single-use. Once it’s scanned and consumed, whether the install finished successfully or not, it stops working, and the error message you’ll see is usually vague: “unable to add cellular plan” or “this code has already been used.”
Here’s how to tell what’s actually happening and fix it:
- Check for a consumed code first. If you’ve scanned this QR before on any device, it’s likely already used up. You’ll need a reissued code from your provider, not a rescan.
- Rule out a bad scan. Display the QR code on a separate screen (laptop or tablet), increase your phone’s screen brightness if you’re scanning from a printout, and clean your camera lens. Glare and low contrast cause more failed scans than people expect.
- Use manual entry when scanning fails repeatedly. Most providers let you enter the SM-DP+ address and activation code directly in your cellular settings instead of scanning. Our guide on activating an eSIM without a QR code walks through the exact fields to fill in.
- Switch networks if the download stalls partway. Move off a captive-portal network, try a phone hotspot instead, and avoid networks that require a login page.
- Give the server a few minutes. If your provider’s activation servers are briefly overloaded, retrying five to ten minutes later often succeeds where an immediate retry fails.
Pro Tip: Many provider apps let you re-download a consumed profile instantly through in-app chat support, which is faster than opening a support ticket and waiting for a reply.
What to Do When Activation Freezes or Fails
An eSIM install can finish downloading and still get stuck on “Activating…” That’s usually the carrier’s backend catching up, not your phone malfunctioning. Provisioning typically completes within a few minutes, but during high-traffic periods it can stretch longer.
If activation is spinning or has reported a failure, work through this order before assuming something is broken:
- Toggle Airplane Mode on and off to force a fresh network handshake.
- Turn the eSIM line off, then back on, in your cellular settings.
- Restart the device fully rather than just locking and unlocking it.
- Wait 15 to 30 minutes. Server-side provisioning delays are common and usually resolve on their own.
- If it’s still stuck after that window, contact your provider with details ready.
Before you reach out, screenshot the exact error message and check Settings > General > About for your iOS or Android version. Having that on hand cuts a support conversation down from several exchanges to one.
Fixing “No Service” or “Connected but No Internet”
A successful install doesn’t guarantee working data. This is one of the most common eSIM common installation issues reported after setup finishes without any visible error.
- Confirm which line is carrying data. Both iPhone and Android let you install an eSIM without actually setting it as the active data line. Check Settings > Cellular (iOS) or Network & Internet > SIMs (Android) and make sure the eSIM, not your old physical SIM, is selected for data.
- Turn on Data Roaming if you’re outside your home country. Without it, the eSIM connects to a network but blocks data entirely, which looks identical to a broken profile.
- Check your APN settings. A missing or incorrect Access Point Name is one of the most common causes of “connected but no internet.” Save the APN details from your provider’s confirmation email, since a small number of international plans need manual APN entry rather than automatic configuration.
- Try manual network selection. Go into carrier settings and select your network manually instead of relying on automatic selection. What looks like a broken eSIM is often just a coverage or plan restriction being misread as a settings error.
Our breakdown of eSIM no-data fixes for travelers covers the APN field names most providers use, in case your settings menu doesn’t label them the same way.
Pro Tip: If data works on Wi-Fi but not cellular, that almost always points to the data-line selection or APN, not a defective eSIM profile.
Is Your Device Actually Compatible?
Before chasing network settings, rule out compatibility. Not every unlocked phone supports eSIM, and a locked device will block activation outright, no matter how many times you retry.
- Check carrier lock status. On iPhone: Settings > General > About > Carrier Lock. Android devices show similar information under Settings > About Phone, though the exact label varies by manufacturer.
- Update your OS before troubleshooting further. Apple’s own support sequence for eSIM issues includes checking for a carrier-settings update prompt in Settings > General > About, which appears automatically after certain OS updates and is easy to miss.
- Apply pending carrier-settings updates. Android’s eSIM documentation notes that some install and activation flows, including Quick Transfer between two iPhones, require a minimum OS or carrier-settings version to work at all.
Skipping this step is the most common reason a technically fine eSIM install fails silently.
Advanced Fixes for Persistent eSIM Problems
If the basics haven’t worked, a few deeper steps can isolate the cause, but they come with trade-offs worth knowing before you use them.
- Reset Network Settings as a last resort. This clears saved Wi-Fi passwords and, on many devices, deletes stored eSIM profiles entirely. Only do this if you have your activation details backed up, since you may need to reinstall the eSIM from scratch afterward.
- Check your IMEI and EID. Your provider may ask for these to confirm your device is properly registered on their system. Find them under Settings > General > About (iPhone) or Settings > About Phone (Android).
- Test the same profile on a second device if one is available. If the identical eSIM installs cleanly elsewhere, the problem is your original device, not the plan or provider.
- Rule out MDM or VPN interference. Corporate-managed devices running Mobile Device Management profiles, and personal VPNs, can silently block eSIM installation. Try disabling the VPN or testing on a personal, unmanaged device before assuming the eSIM itself is faulty.
When to Contact Provider Support
Once you’ve worked through the checklist and the eSIM still won’t install or activate, gather this before you reach out:
- Your order number and a screenshot of the exact error message.
- Your device’s IMEI, EID, and OS version from Settings > General > About.
- A note on which step in the process failed and roughly when.
Providers can typically reissue a QR code or re-push a profile within minutes once they confirm your account. Carrier-side fixes, like unlocking a device or re-provisioning a primary number, take longer and may require your carrier directly rather than the eSIM provider. Screenshots consistently cut resolution time versus a text description alone.
Preventing eSIM Problems Before They Start
- Install before you travel, on your home Wi-Fi, never on hotel or airport networks. Our guide to installing and activating an eSIM before traveling abroad covers the ideal timing window.
- Save your activation code and QR screenshot somewhere outside your photo library, since a factory reset or Reset Network Settings can wipe both the profile and the record of it.
- Keep a backup line active during the switch, and hold off on nonessential OS upgrades until you have reliable connectivity confirmed.
Pro Tip: Most provider apps let you re-download a profile if it fails partway, so keep the app installed instead of relying only on the original QR code or email.
Who’s Behind This Guide
Esimglobe has supported eSIM installs and activations across 170+ countries, with troubleshooting patterns drawn from real support cases.
- Author: daniele,
- Esimglobe support runs 24/7 and can reissue or re-push a profile directly when a code fails
- See our eSIM purchasing tips for international travelers for plan selection guidance
Steps to Remove and Reinstall an eSIM Profile Securely
Sometimes a clean reinstall is the fastest fix, especially after a failed activation that left a corrupted or half-installed profile behind. Doing it in the right order prevents you from losing access entirely.
On iPhone: Go to Settings > Cellular, tap the eSIM plan, and select “Remove Cellular Plan.” Confirm you have the original QR code or activation details saved before you do this, since Apple doesn’t always let you redownload a removed profile without contacting the provider again. Once removed, restart the device before attempting reinstall.
On Android: Navigate to Settings > Network & Internet > SIMs, select the eSIM, and choose “Remove SIM” or “Erase.” The exact wording varies by manufacturer, since Android’s eSIM menus aren’t standardized the same way across brands.
Before removing anything, confirm your provider allows a re-download. Some eSIM profiles are locked to a single install and require a support request to reissue, while provider apps often support instant self-service redownloads.
After removal, restart your device fully rather than just toggling airplane mode. A fresh boot clears any lingering network registration tied to the old profile, which prevents the new install from conflicting with cached settings. Then reinstall exactly as you did the first time, ideally on the same stable Wi-Fi network you used originally. If the reinstall still fails after a clean removal and restart, that’s a stronger signal the issue is server-side or account-related rather than a device glitch, and it’s a good point to contact support with your removal timestamp noted.
iPhone vs Android: Where the Troubleshooting Actually Differs
The core fixes overlap heavily between platforms, but the menus, error messages, and failure patterns diverge enough to trip people up if they’re following generic advice.
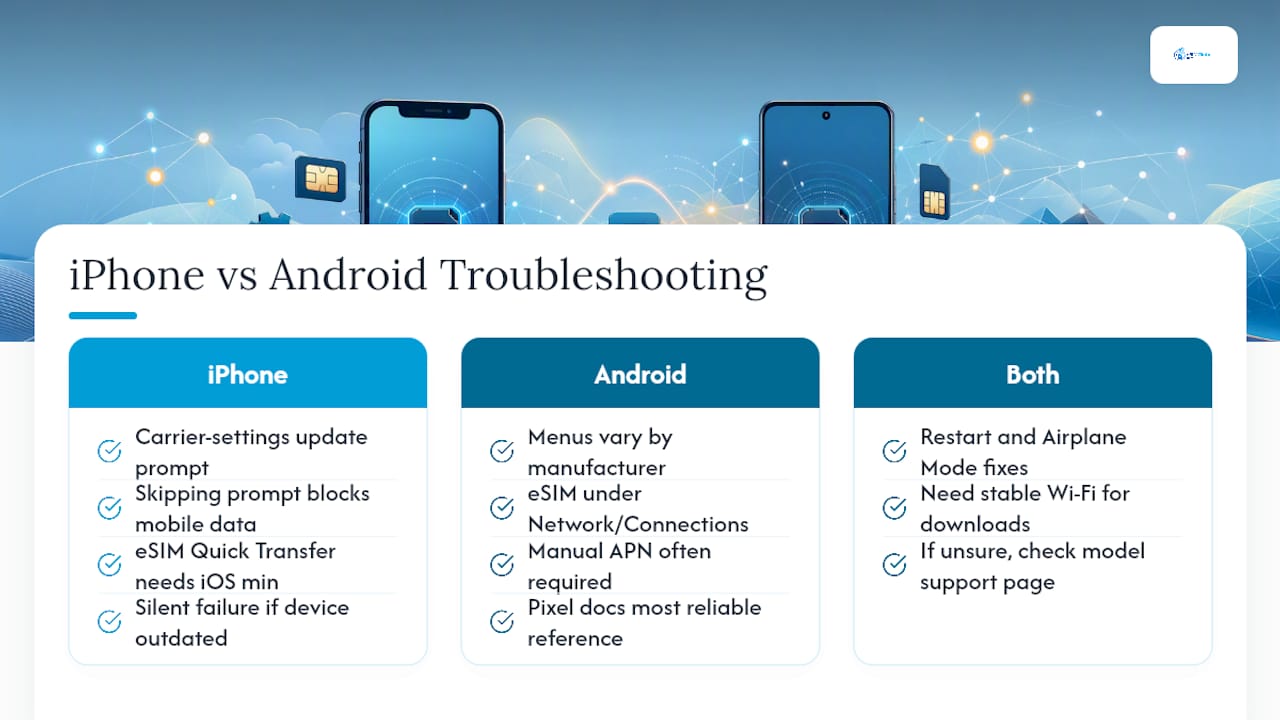
iPhone specifics: Apple’s system tends to surface a clear carrier-settings update prompt after installing a new eSIM, and skipping it is one of the most overlooked causes of a “working” eSIM that still shows no data. iPhones also handle eSIM Quick Transfer between two Apple devices, which has its own minimum iOS version requirement and fails silently if either device is out of date. Carrier lock status lives specifically under Settings > General > About > Carrier Lock, and a locked device will block eSIM activation regardless of how correct your steps are.
Android specifics: Menu paths vary meaningfully by manufacturer. Samsung, Google Pixel, and other Android brands each label eSIM settings slightly differently, usually under Network & Internet or Connections, and Google’s own Pixel support documentation is the most reliable reference if your specific model’s menu doesn’t match generic instructions. Android devices are also more likely to need manual APN entry for a given provider, since automatic APN configuration isn’t universal across every Android build.
Where both platforms agree: Restart sequences, Airplane Mode toggling, and the need for stable Wi-Fi during download all behave the same way. If a fix works differently than described here, checking your specific model’s official support page beats guessing.
Handling Dual SIM and Multiple eSIM Profile Conflicts
Running two active lines, a physical SIM plus an eSIM, or two eSIMs at once, is where a lot of “random” connectivity issues actually come from. The phone isn’t malfunctioning; it’s just following data-priority rules you haven’t set.
Most dual SIM confusion traces back to one of three settings mismatches: the wrong line is set for data, the wrong line is set for calls and texts, or both lines are trying to use data simultaneously in a way your device doesn’t support. Check your cellular settings menu for a “Default Line for Data” or equivalent option, and confirm it points to the eSIM you actually want carrying your traffic, especially if you just added a travel eSIM alongside your regular number.
Some older or budget Android devices only support one active radio at a time between two SIM slots, meaning your eSIM and physical SIM can’t both stay online simultaneously even if both show as “active” in settings. This shows up as intermittent service that looks like a bug but is actually a hardware limitation. If you’re juggling more than two profiles (say, a home line, a work eSIM, and a travel eSIM), most devices cap how many can be stored at once, and installing past that limit can force you to delete an older profile before a new one will download. Check your storage limit before travel if you regularly rotate eSIMs between trips, so you’re not troubleshooting a “failed install” that’s actually just a full profile slot.
Moving an eSIM Profile to a New Device
Unlike a physical SIM card, you can’t just pop an eSIM out and move it. Most providers tie a profile to a specific device’s EID, meaning a straight transfer between two phones isn’t supported by default and usually requires provider involvement.
If you’re upgrading phones, the general path is: contact your provider before you switch devices, request a fresh QR code or reissued activation link for the new device, and remove the eSIM from the old device only after confirming the new one is active. Removing it too early, before the new install is confirmed working, can leave you without service on either device in the meantime.
Apple’s Quick Transfer feature is the one built-in exception, allowing certain eSIM profiles to move directly between two iPhones during setup, provided both devices meet the minimum iOS version for that flow. Android doesn’t have a universal equivalent yet, so most Android-to-Android or cross-platform moves go through the provider reissue process instead.
Before initiating any transfer, back up your activation code and provider account details. If the new device fails to activate after a transfer attempt, having the original confirmation email means you can request a reissue immediately rather than waiting on additional verification.
How to Confirm Your eSIM Is Actually Active
A profile can look installed while still not carrying any traffic, so a quick verification pass saves you from troubleshooting a problem that doesn’t exist.
On iPhone, go to Settings > Cellular and confirm the eSIM plan shows a green dot or “Active” status next to it, not just “Installed.” On Android, Settings > Network & Internet > SIMs should show the eSIM toggled on with a signal indicator, not grayed out. Both platforms will also show a network name in your status bar; if it says “No Service,” “SOS Only,” or shows nothing at all, the profile is installed but not registered on a network yet.
A more reliable check: open a browser and try loading a page with Wi-Fi turned off entirely. If nothing loads and your status bar shows a signal, the issue is almost certainly APN or data-line selection, not the profile itself. If there’s no signal at all, that points back to activation or network registration rather than a data configuration problem.
Some provider apps include a built-in status check that pings their servers directly and confirms whether your specific profile is provisioned correctly on their end, which is often faster and more accurate than reading your phone’s generic signal icons. If your provider offers this, it’s the fastest way to rule out a device-side issue before contacting support.
Security Considerations When Installing and Managing eSIMs
An eSIM profile is tied to your device’s EID and account credentials, which makes it harder to clone than a physical SIM, but that doesn’t make it risk-free.
Only scan QR codes or enter activation details from sources you trust directly, ideally your provider’s official confirmation email or app. A QR code shared over unsecured channels, screenshotted and forwarded, or posted publicly can potentially be used by someone else if it hasn’t been activated yet, since the code itself is what authorizes the install. Treat an unused activation code the way you’d treat a gift card number.
Public Wi-Fi during installation carries its own risk beyond just connectivity problems. Captive portal networks at airports and hotels are also common targets for network-level snooping, so downloading a profile that includes account-linked data over an open network is worth avoiding even when the connection itself works fine.
When removing an old eSIM, especially before selling or trading in a device, confirm removal actually happened in your cellular settings rather than assuming a factory reset alone clears it. On managed corporate devices, Mobile Device Management software can also control which eSIM profiles are allowed to install at all, which is a security feature, not a bug, if you’re troubleshooting on a work phone that suddenly won’t accept a personal travel eSIM.
Useful Sources
- Activate an eSIM without a QR code – EsimGlobe
- eSIM not working: quick fixes for iPhone and Android – EsimGlobe
- Official Apple and Google support pages for device-specific cellular settings
What Actually Matters When an eSIM Won’t Cooperate
The conventional advice treats every eSIM error as a mystery requiring a support ticket. It isn’t. Most failures fall into a handful of predictable categories, and the fix is almost always faster than the wait time for a support reply.
What gets underrated is timing. A stalled activation at the two-minute mark and the same stall at the thirty-minute mark are different problems entirely, one is normal provisioning, the other is a genuine failure, and treating them the same way wastes a traveler’s limited time on a trip. The advice to “just wait” is right, but only within a bounded window.
What gets overrated is the assumption that a failed install means a bad eSIM or a bad device. In practice, it’s usually a QR code that got scanned once too many times, a data line that never got switched, or a captive portal quietly blocking a download in the background. Readers should prioritize ruling out those three before assuming anything is actually broken. The habit worth building isn’t more troubleshooting steps. It’s collecting the right screenshot and account detail before you ever open a support chat, because that single habit turns a multi-day back-and-forth into a same-day fix.
— daniele
Get Your Travel eSIM Sorted Before You Need to Troubleshoot
The single biggest predictor of a smooth eSIM setup isn’t your device, it’s whether you installed it on a slow airport connection at the last minute or on stable Wi-Fi with time to spare. Esimglobe sells prepaid data-only eSIM plans for over 170 countries, delivered instantly by email, so you can install and verify everything is working before you ever leave home.
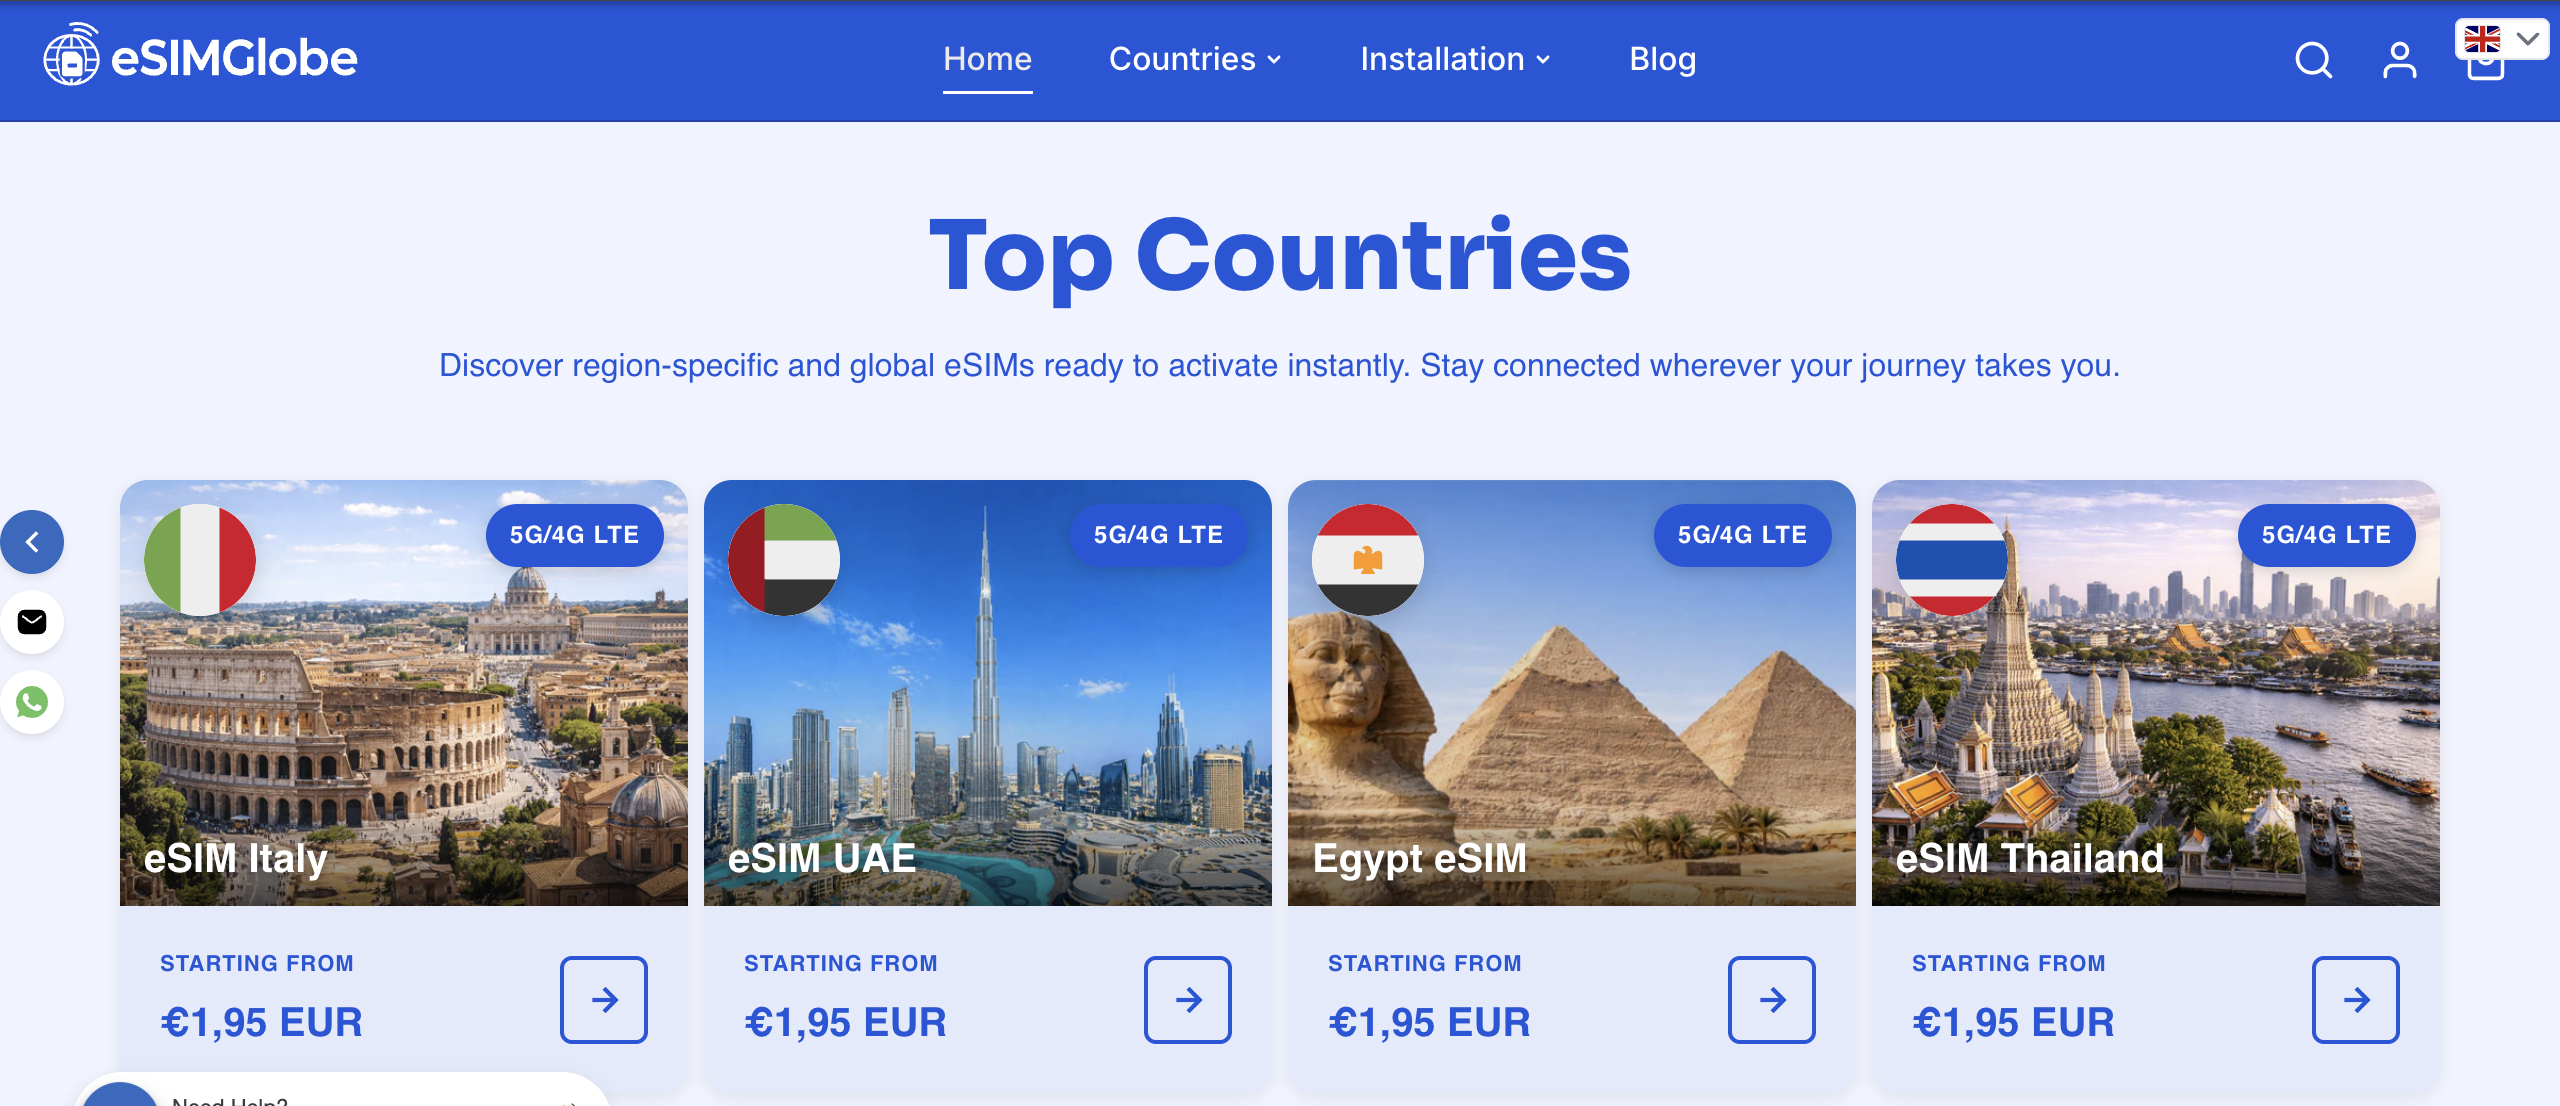
Every plan is selectable by country, region, or currency, with 5G and 4G LTE speeds and 24/7 support that can reissue a profile the moment a QR code gets consumed or a download stalls, no lengthy ticket queue required. If you’re planning a trip, browse plans for your destination and get your eSIM delivered to your inbox at Esimglobe, and install it tonight rather than at the gate tomorrow.
FAQ
How Do I Solve an eSIM Installation Issue?
Start with the reset checklist: stable Wi-Fi, an Airplane Mode toggle, a full restart, and confirming the eSIM is set as your active data line. That sequence resolves most installation and activation failures without needing to contact support.
What Are Common Problems With eSIMs?
The most frequent issues are consumed or invalid QR codes, weak network connectivity during download, carrier lock, an outdated OS missing required carrier settings, and server-side provisioning delays on the carrier’s end.
Why Won’t My eSIM Install?
It’s usually one of three things: the QR code has already been scanned and used, the download stalled on an unstable or captive-portal network, or the device isn’t compatible or is carrier-locked. Checking these three first saves the most time.
How Can I Tell if My eSIM Profile Is Broken?
Check whether the profile shows “Active” rather than just “Installed” in your cellular settings, and confirm your status bar shows a network name rather than “No Service.” If it’s installed but shows no signal after 30 minutes and a restart, contact your provider, since Esimglobe and similar providers can typically reissue a profile quickly once they confirm your account.